Fully Boned Stays – Late 18th Century
1962.1.8
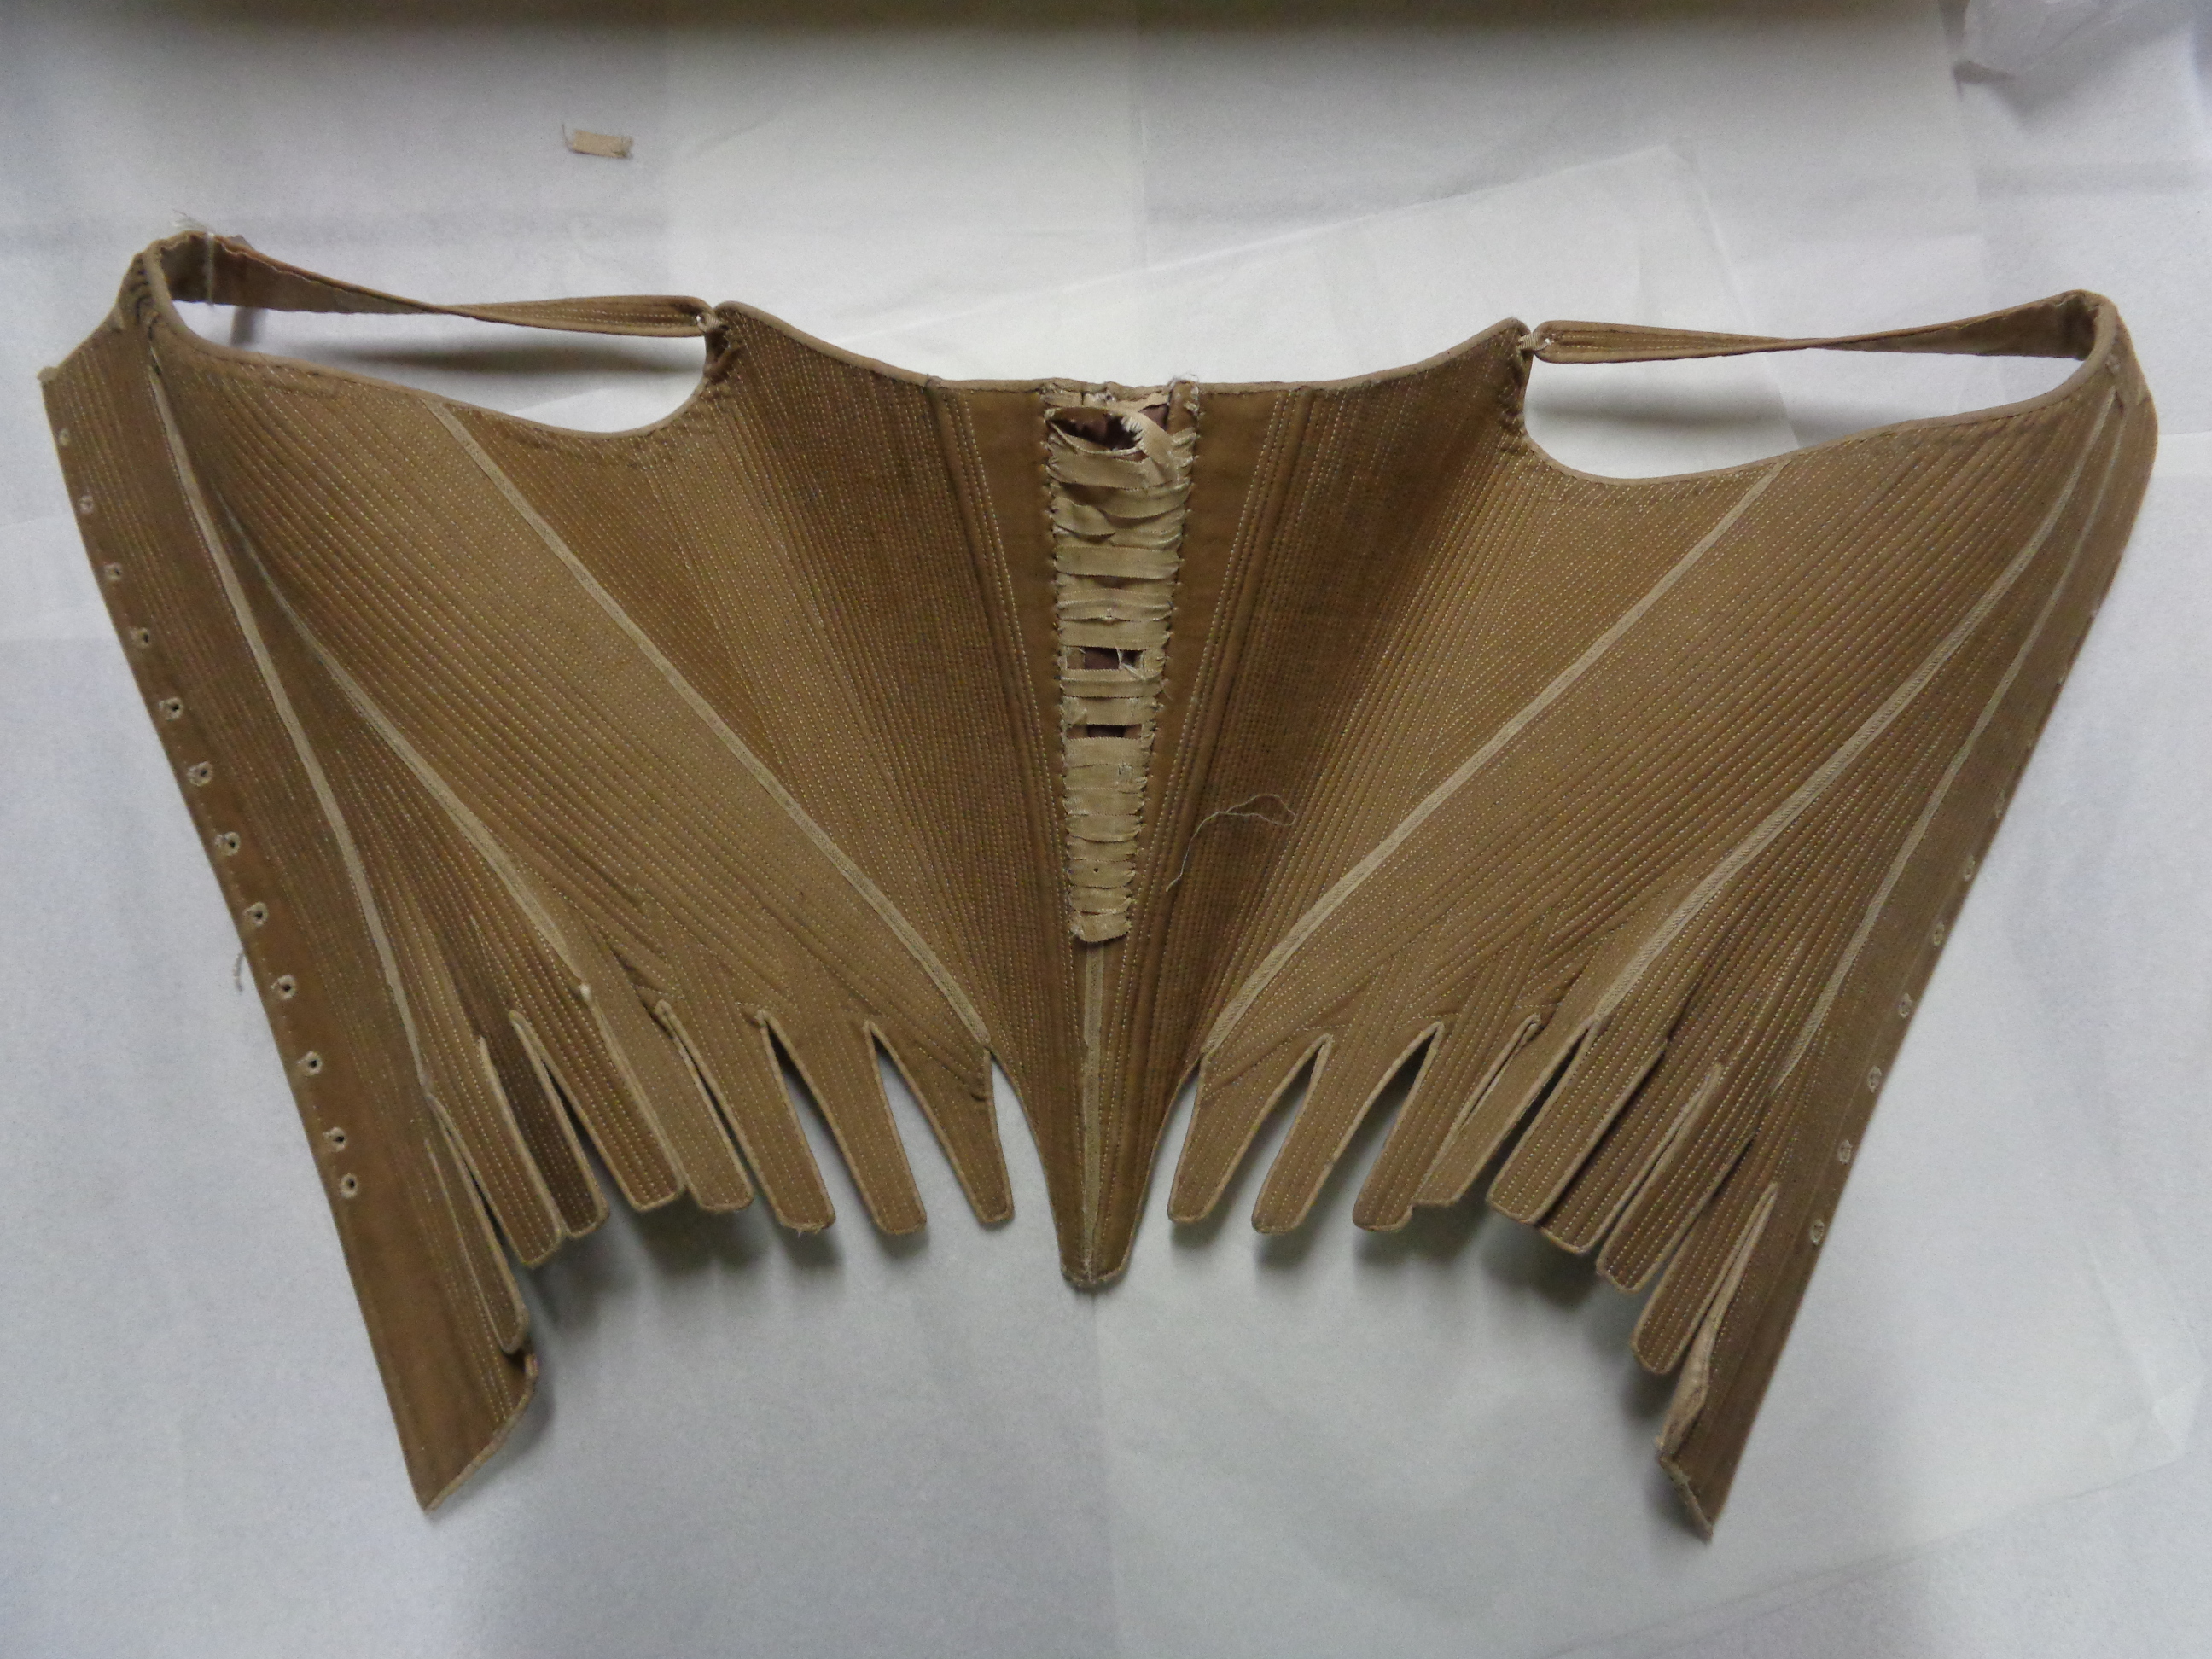
This is an incredibly beautiful pair of stays. We mean it – they’re probably the best stays we’ve ever seen. The logic and beauty behind the boning is stunning. Let us talk you through it.
Details:
- Fully Boned Stays with distinct directional boning.
- CF partial lacing design with 3 stitches from each eyelet. There are 22 eyelets either side.
- 12 eyelets at CB which have a staggered eyelet at the top and bottom.
- Back panel with right angle detail at top.
- This pair of Stays are strapped with the binding coming onto the straps, straight from the top hem.
- Larger bones used at either side under the lacing at the CF to support and control the bust area. 2 other bones come either side of this in the same angle.
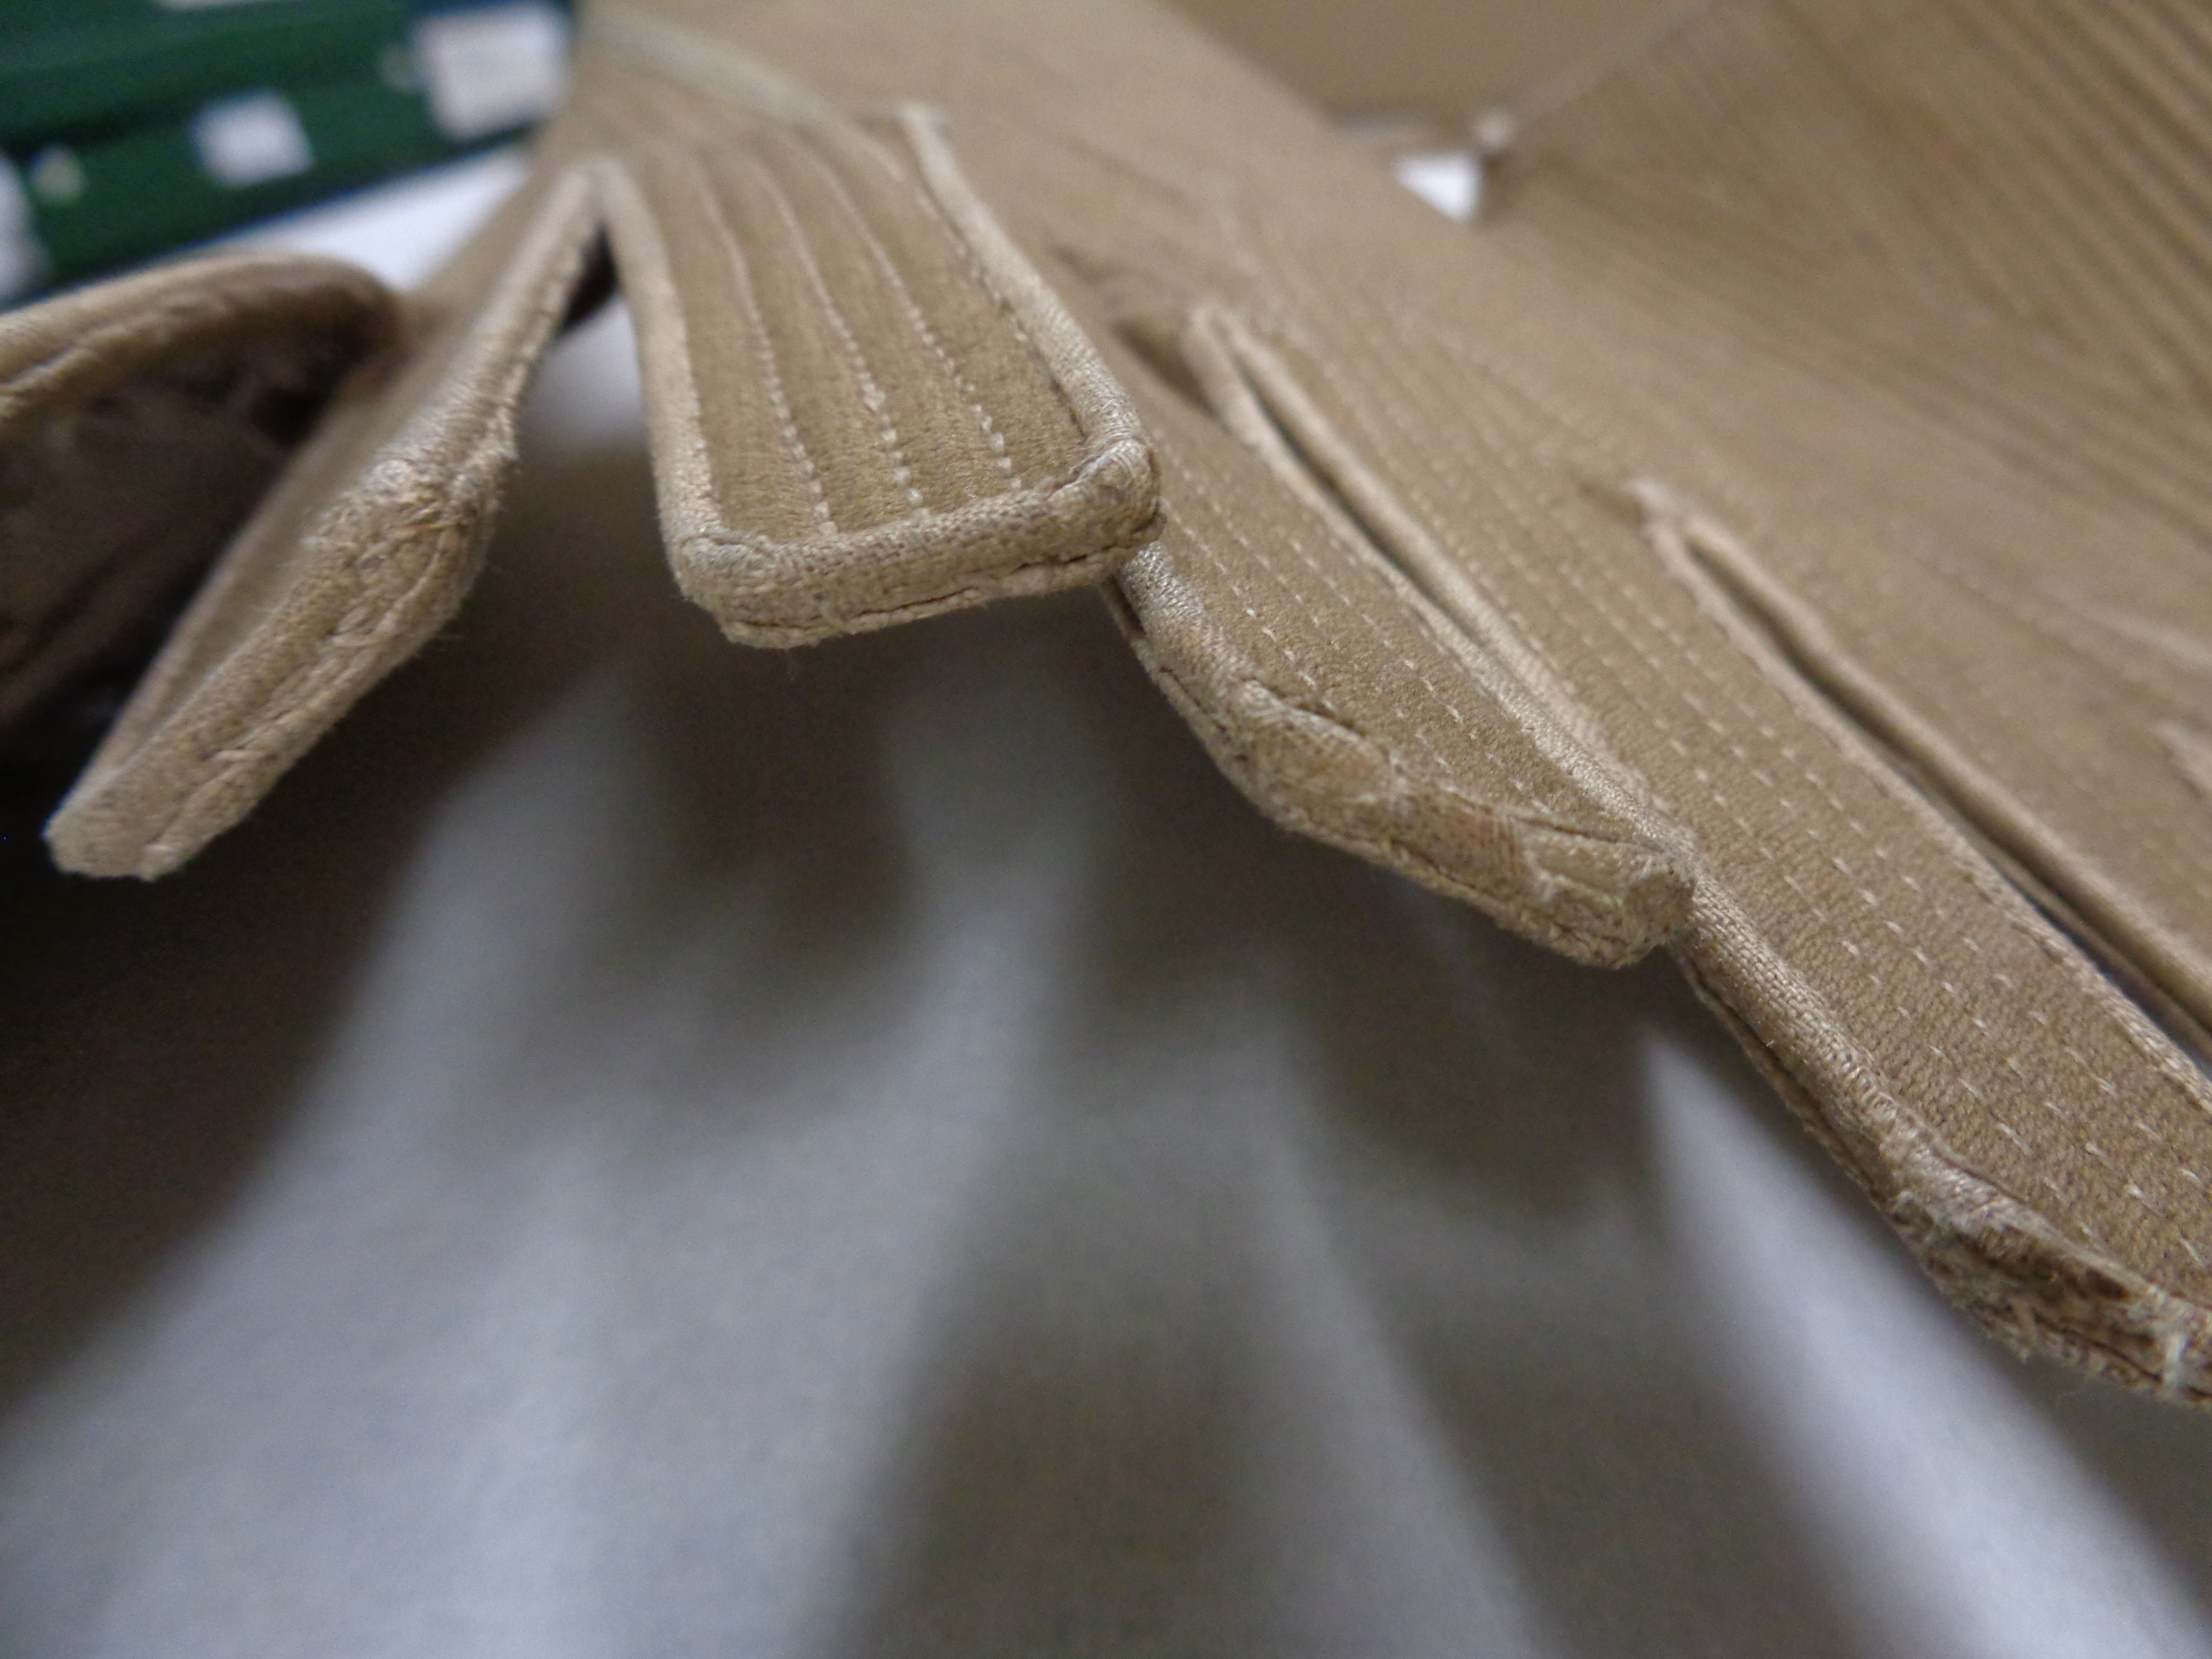
- Main bulk of boning is incredibly fine. We’ve seen this with a lot of Stays from the last qtr of the 18th c. where they become incredibly fine. We’ve got a definite problem using cane for this – the circular centre cane creates too much depth. These stays are really, really thin. We have a photo of this so please look right. They’re still like 4mm to

Acknowledgement to the Bankfield Musuem and the Halifax Museum Services.
5mm but the fineness is very noticeable, especially compared to earlier stays.
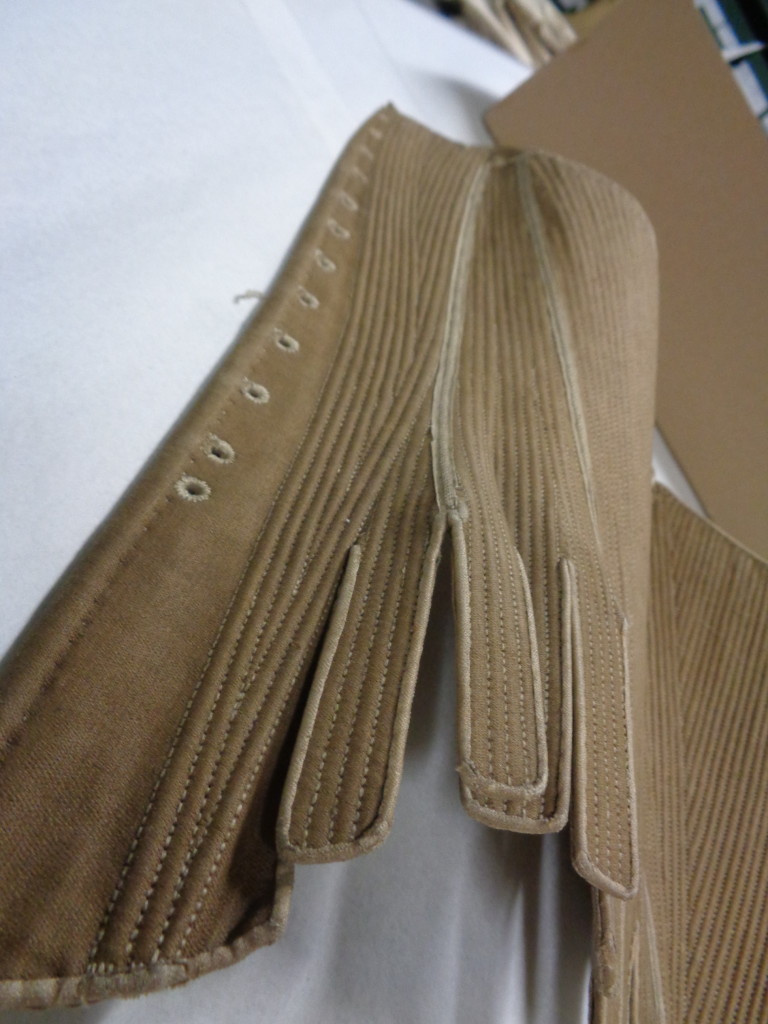
- The Underarm section has been left unboned. We’ve seen this fairly frequently, it’s either this version where the last 1/2″ has been left unboned, a leather strip or nothing.
- There are 2 inner bones – one at the standard neck line, which is about 5/8″ thick and about 2mm deep. The second is in a busk format, about 1/2″ wide and feels fairly solid, about 3mm deep.
- The back boning is the really beautiful. Really. It’s incredibly logical. The way it swerves and moves around the back just shouts support. We’ll show it down somewhere below.
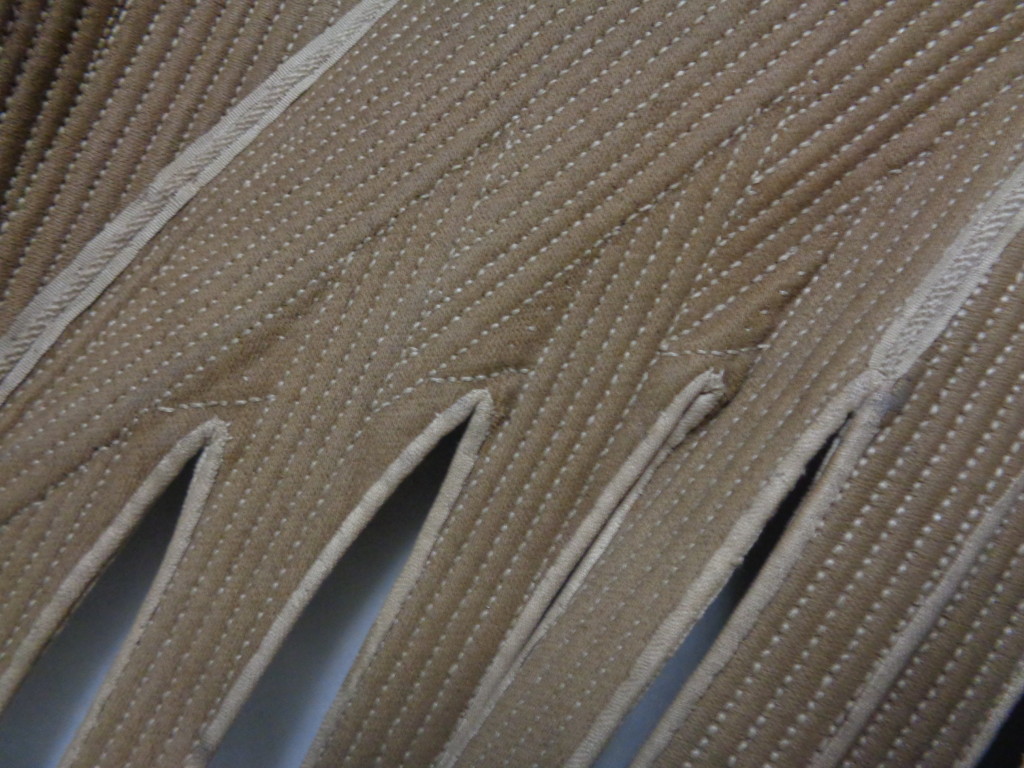
- The CF panel also show a kind of beauty in the way the boning has been structured. At first the boning follows the lines from the larger boning piece that comes at an angle into the CF tab. Then there’s a small section of a grading boning used to begin to blend it into the next section.
- The next section is our favourite bit (apart from the back – we love the back!) but there’s a band of solid boning that would support and push the bust into front. We’ve put a photo of this but it’s further down.
- Generally each boning channel measures about 1/8″ whilst the larger boning channels are 3/8″.
- The stitching on the tab runs pretty much in parallel with the grain line of the fabric – especially at the first tab of the Side Front Panel. It’s still pretty much follows the grainline, though it does wander off a little.
- Also the Binding is very fine – thsi is probably mostly due to the thinness of the layers and the lack of boning at the edges in most places, but however, it’s another example of the neatness and fineness of both, this pair of Stays and late 18th c stays in general.
- This pair of Stays uses virtually the same ribbons to sew down over the panel seams as early stays virtually 40 years previous. So far, we’ve not see this type of ribbon used

Image courtesy of Bankfield Museum and Halifax Museum Group.
anywhere else and it’s likely it was made specifically for the making of Stays. It would be interesting to research a ribbon manufacturer and see what variety of type of ribbons they manufactured.
Measurements:
- Cf length = 11″
- Unboned Gap at CF = 4″
- 15″ curve of neckline.
- 11 1/2″ in straight line across the curve.
- CF to CB over estimated Bust line =18″ ish (on the half).
- Side Front Panel seam = 10 7/8″.
- CF to Shoulder Strap point = 14″
- CF to CB over estimated waist line = 12 5/8″ (on the half)
- CB length = 16 1/2″
- Width of the top of the back panel = 3 5/8ths
- The diagonal of the back angle = 2 3/8″
The Boning at CB also needs to be pictured….

Image courtesy of the Bankfield Museum and Halifax Museum Services.
- Look at the curved formations – there is a swell of boning gently curving from the top back, inclining into the waist and flowing on down to the bottom of the tab. This blends beautifully into another group of bones flowing down from the top of the panel but this time from the side. So meeting at the tab you have a complete bone set from either side of the top. The fill in, still flowing in the same movement from the Top Side bones then gently meet the Back group. Isn’t it stunning!
- Also, see how the CB panel has it’s own tab. We’ve got to research more as to when this begins to creep in but earlier Stays seem to be unified in the fact that they don’t have them. It’d be interesting to know why, if it’s important, this tab has moved from the Side Back Panel to the CB. For all we know, it could be simply a method of spreading out the tab layout for a larger figure. The finished waist measurement for this pair of Stays is only about 23″ so not a particularly massive waistline but that’s the finished waist measurement and we don’t really know how much they allowed for reducing the waistline and bust.
- There are 8 tabs, not including the CB and CF. 1 on the CB panel, 3 on the Side Back Panel and 4 on the Side Front Panel. They are long and straight with a squared end in nature.
- The finished Scye measurement, with the strap tied on to meet the CF point is 18″.
During the hectic dash of scribbling notes, trying to figure out mathmatical pattern cutting, taking photos and sketching that all takes place during a study session, we sometimes also take little videos. Mainly this is because we secretly suspect that our notes won’t make much sense to us later on, and having a video to go along side is an enormous help. Most of these we keep to ourselves but some of them prove to be particularly useful in describing something about the item. Here we have a quick film of us talking ourselves through the inner boning. As it clearly shows the inner structures and techniques 18th c Staymakers used, we thought we’d pop it up for you guys to view. Please click here on this link that will take you to Youtube. This is the Video Link – CLICK here!


