
Individual Garment Studies:
Green Fully Boned Stays
Sno.1291
All Images Courtesy of Berrington Hall, NT
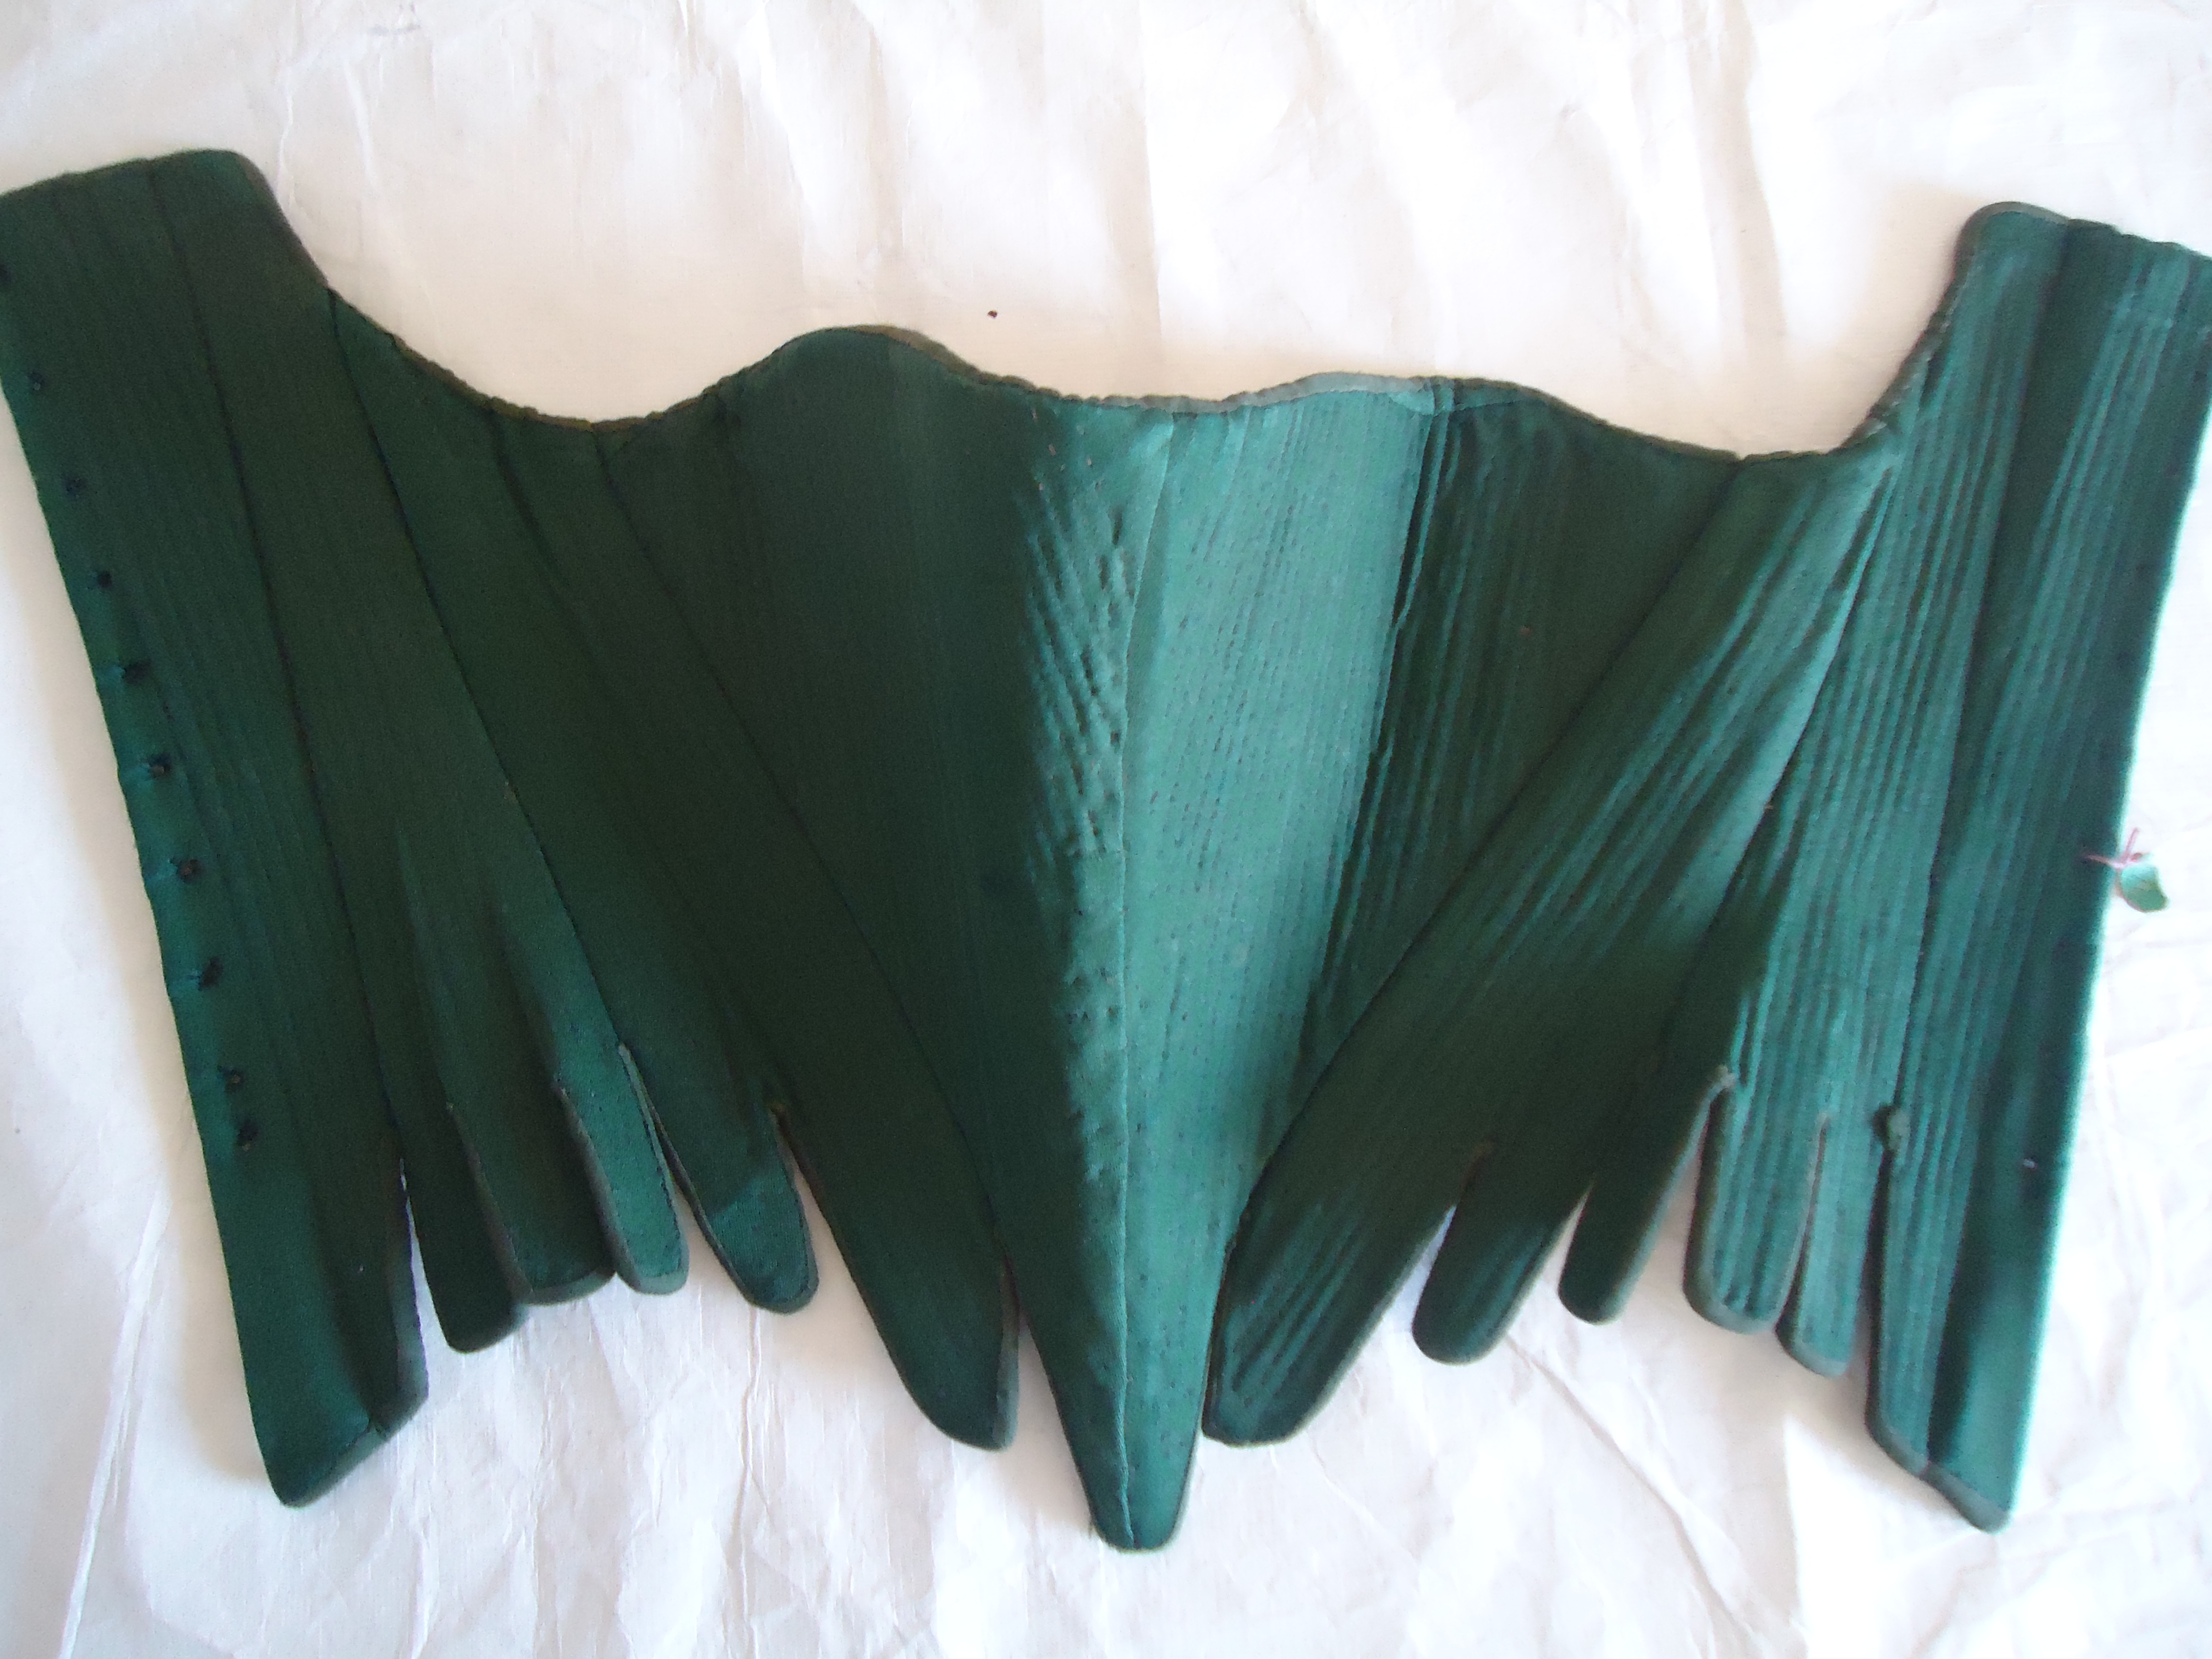
Front View – SNO.1291
Details:
– Fully Boned.
– Strapless.
– After having had an amazing chat with a Historian who had also seen these Stays – he pointed out that they had been recovered. He said that sometimes what could look like initial shoddy work was actually the quicker work of someone recovering a pair and sewing the boning channels on the new layer of fabric. Because those channels were already sewn but underneath the new layer, the stitching could be a little more carefree and often was much more clunky and chunkier – fascinating!
– CF panel bones are at an angle, aiming into the CF line.
– Side Front Panel’s (SFP) bones go with the direction of the CF/SFP seam.
– Side Back and Back (SB and CB for future reference) are straight down although depending on CB grainline, they do angle slightly away from the lower back.
– Chunky front tab and the SFP has only two tabs, both angled towards the CF point.
– 8 x panels
– 11 x eyelets at CB.
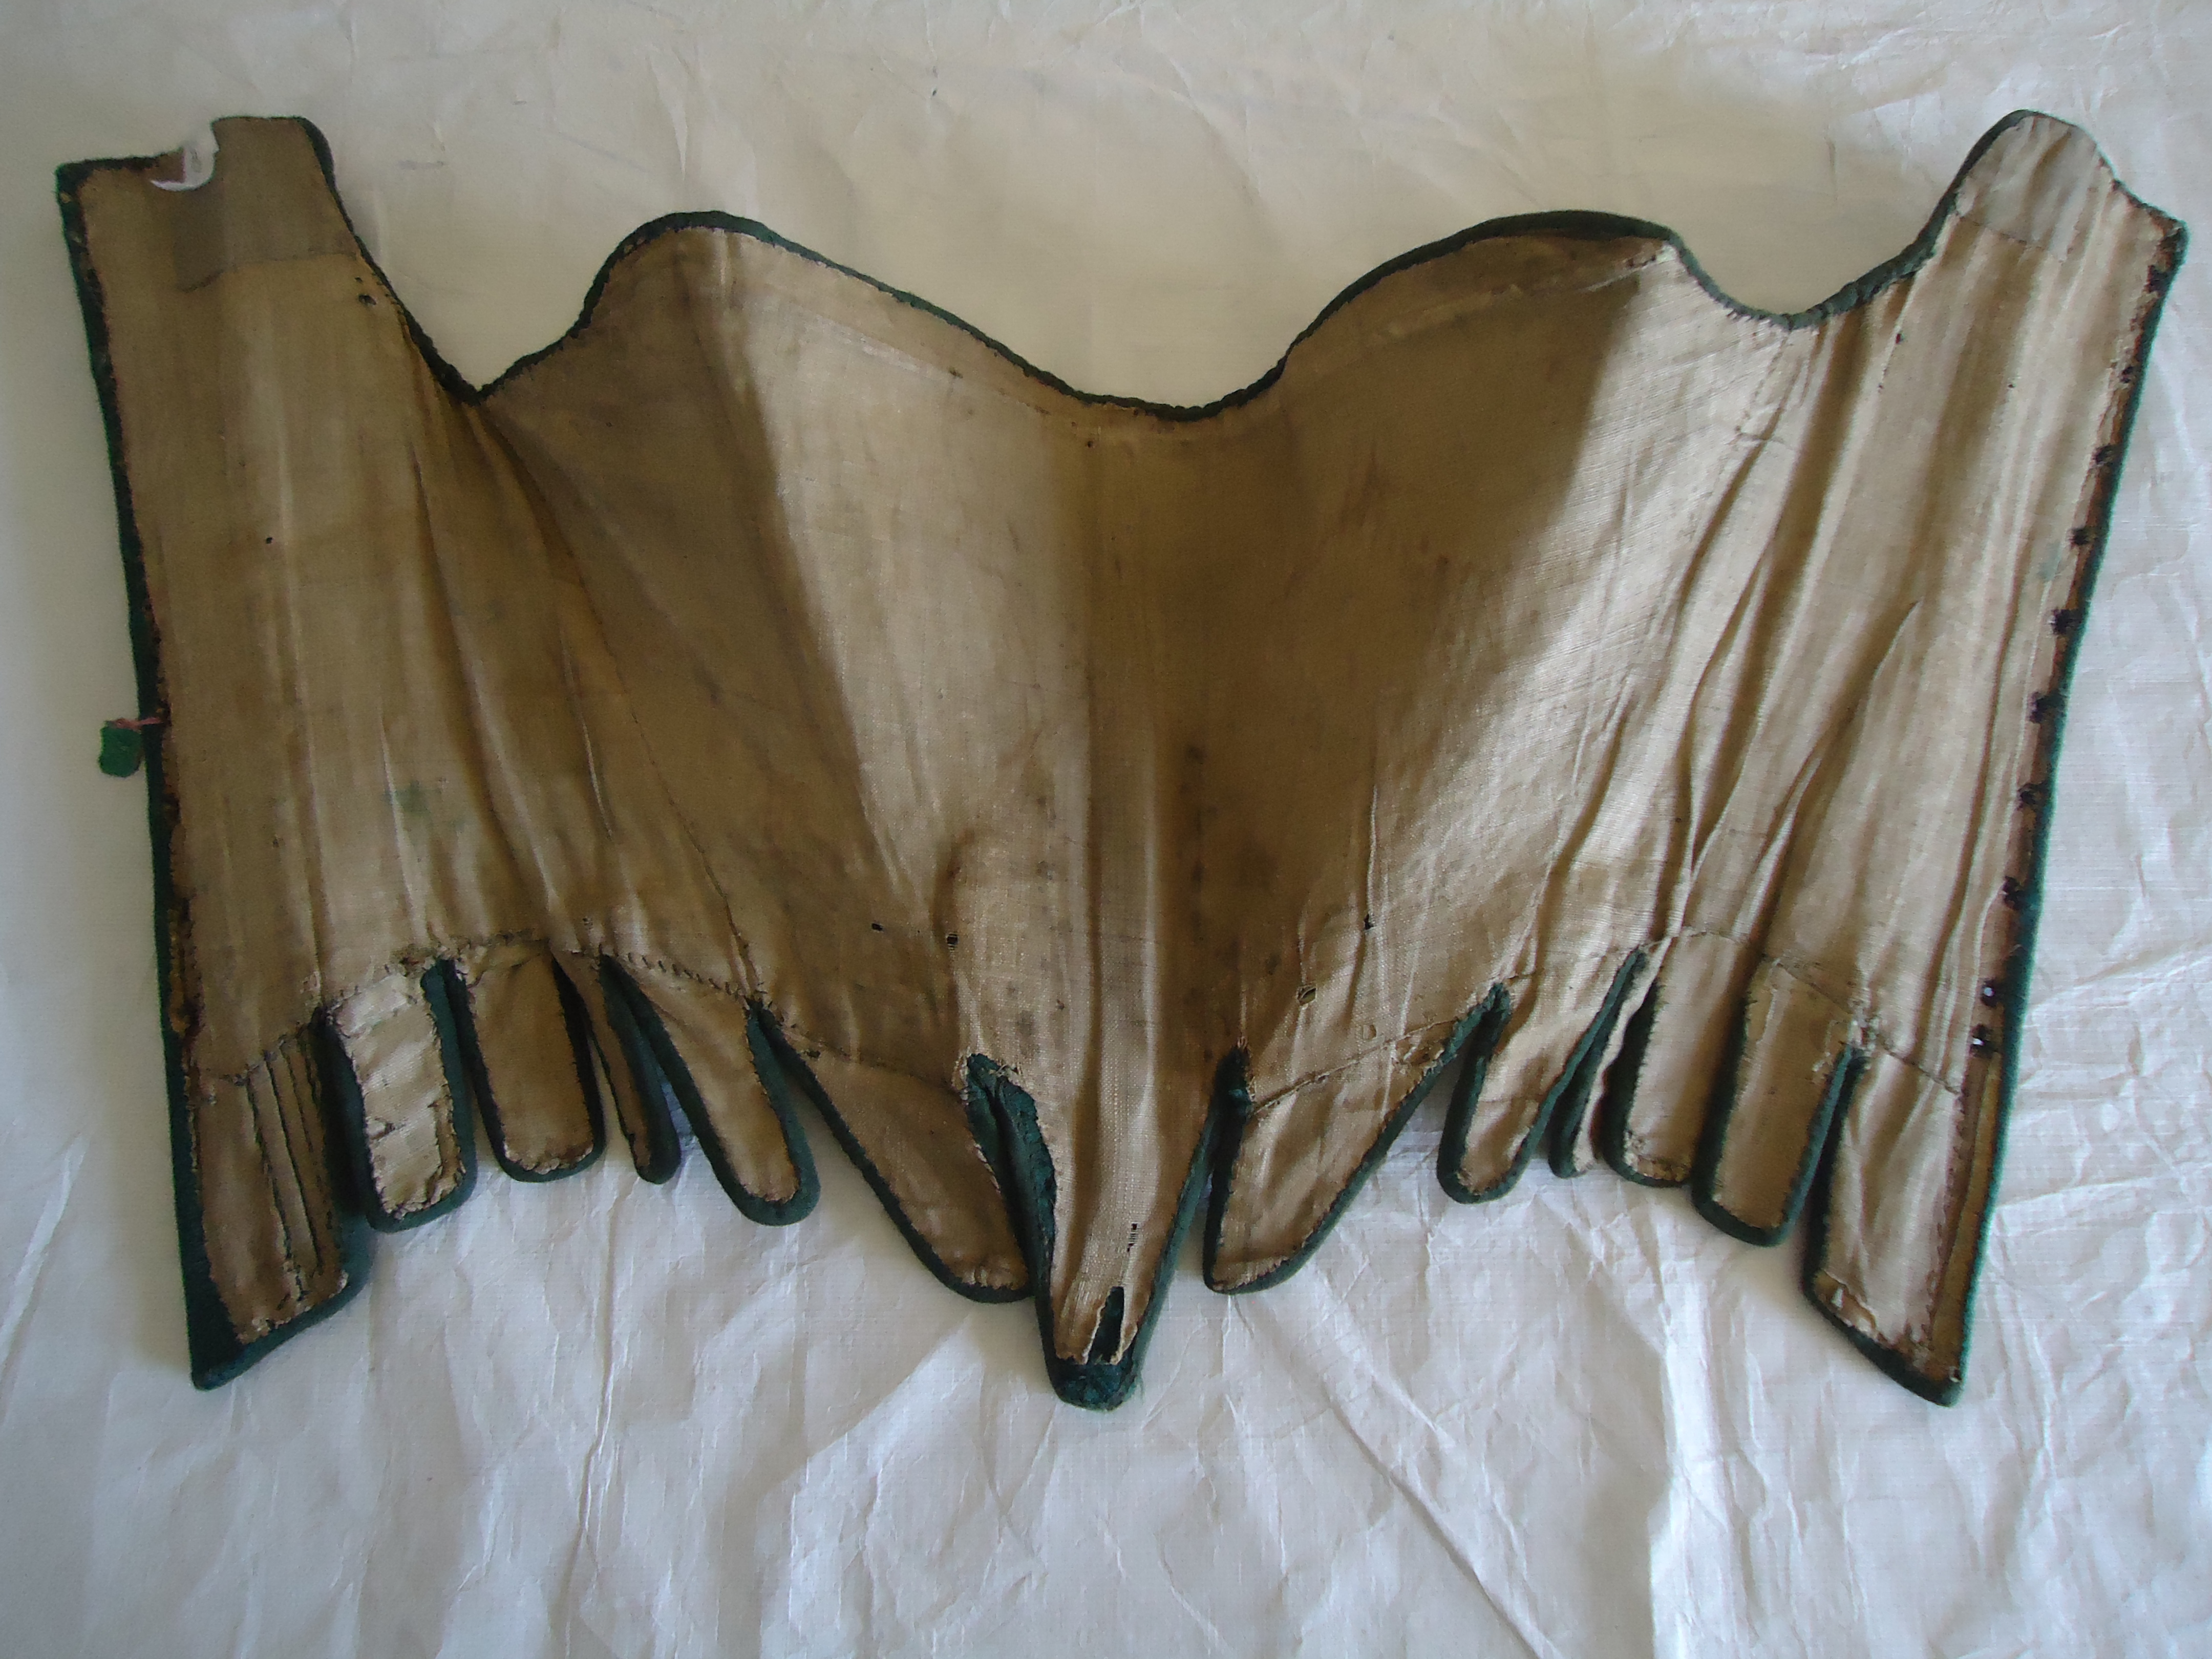
Back View – SNO.1291
The lining has been done in the standard way – tabs done individually (and first) and then the main body of the Stays done in two panels. You can also see here a shadow of the busk – not a shaped one but flat and broad – probably about 3/4″ wide. You can also see the impression of the bone that runs along the decolletage of Stays. This pair only has one bone and it looks fairly slim.
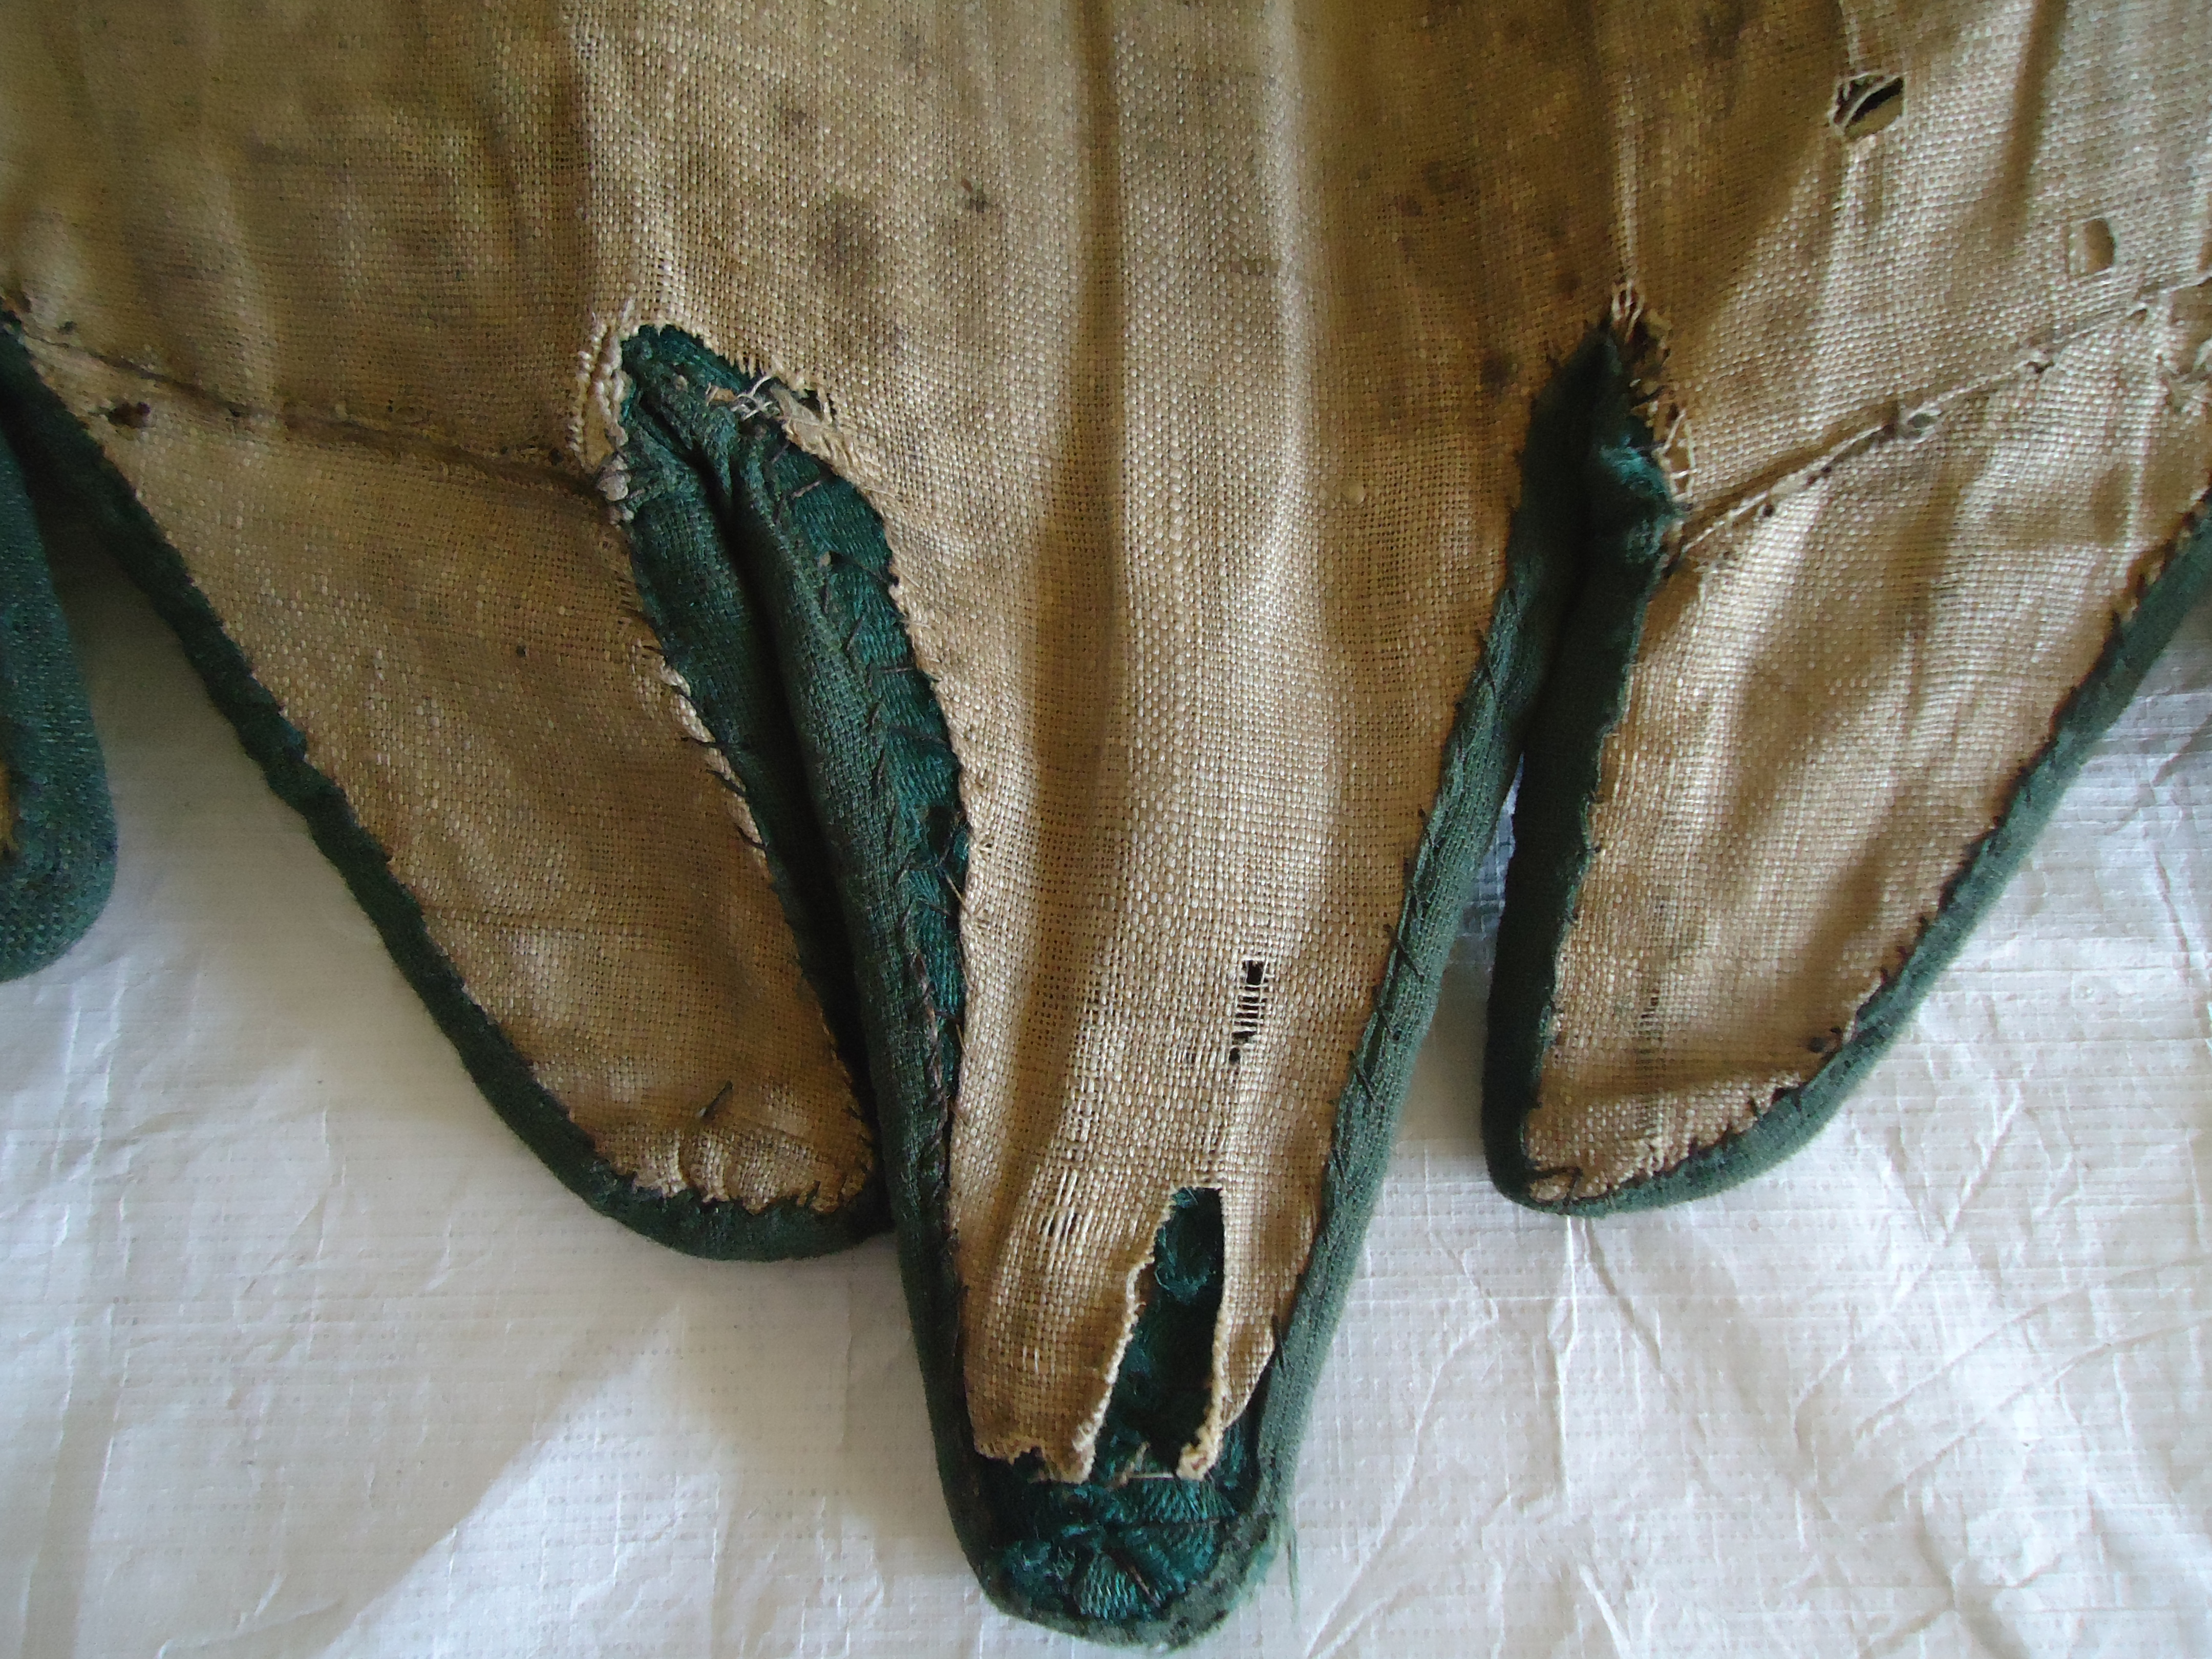
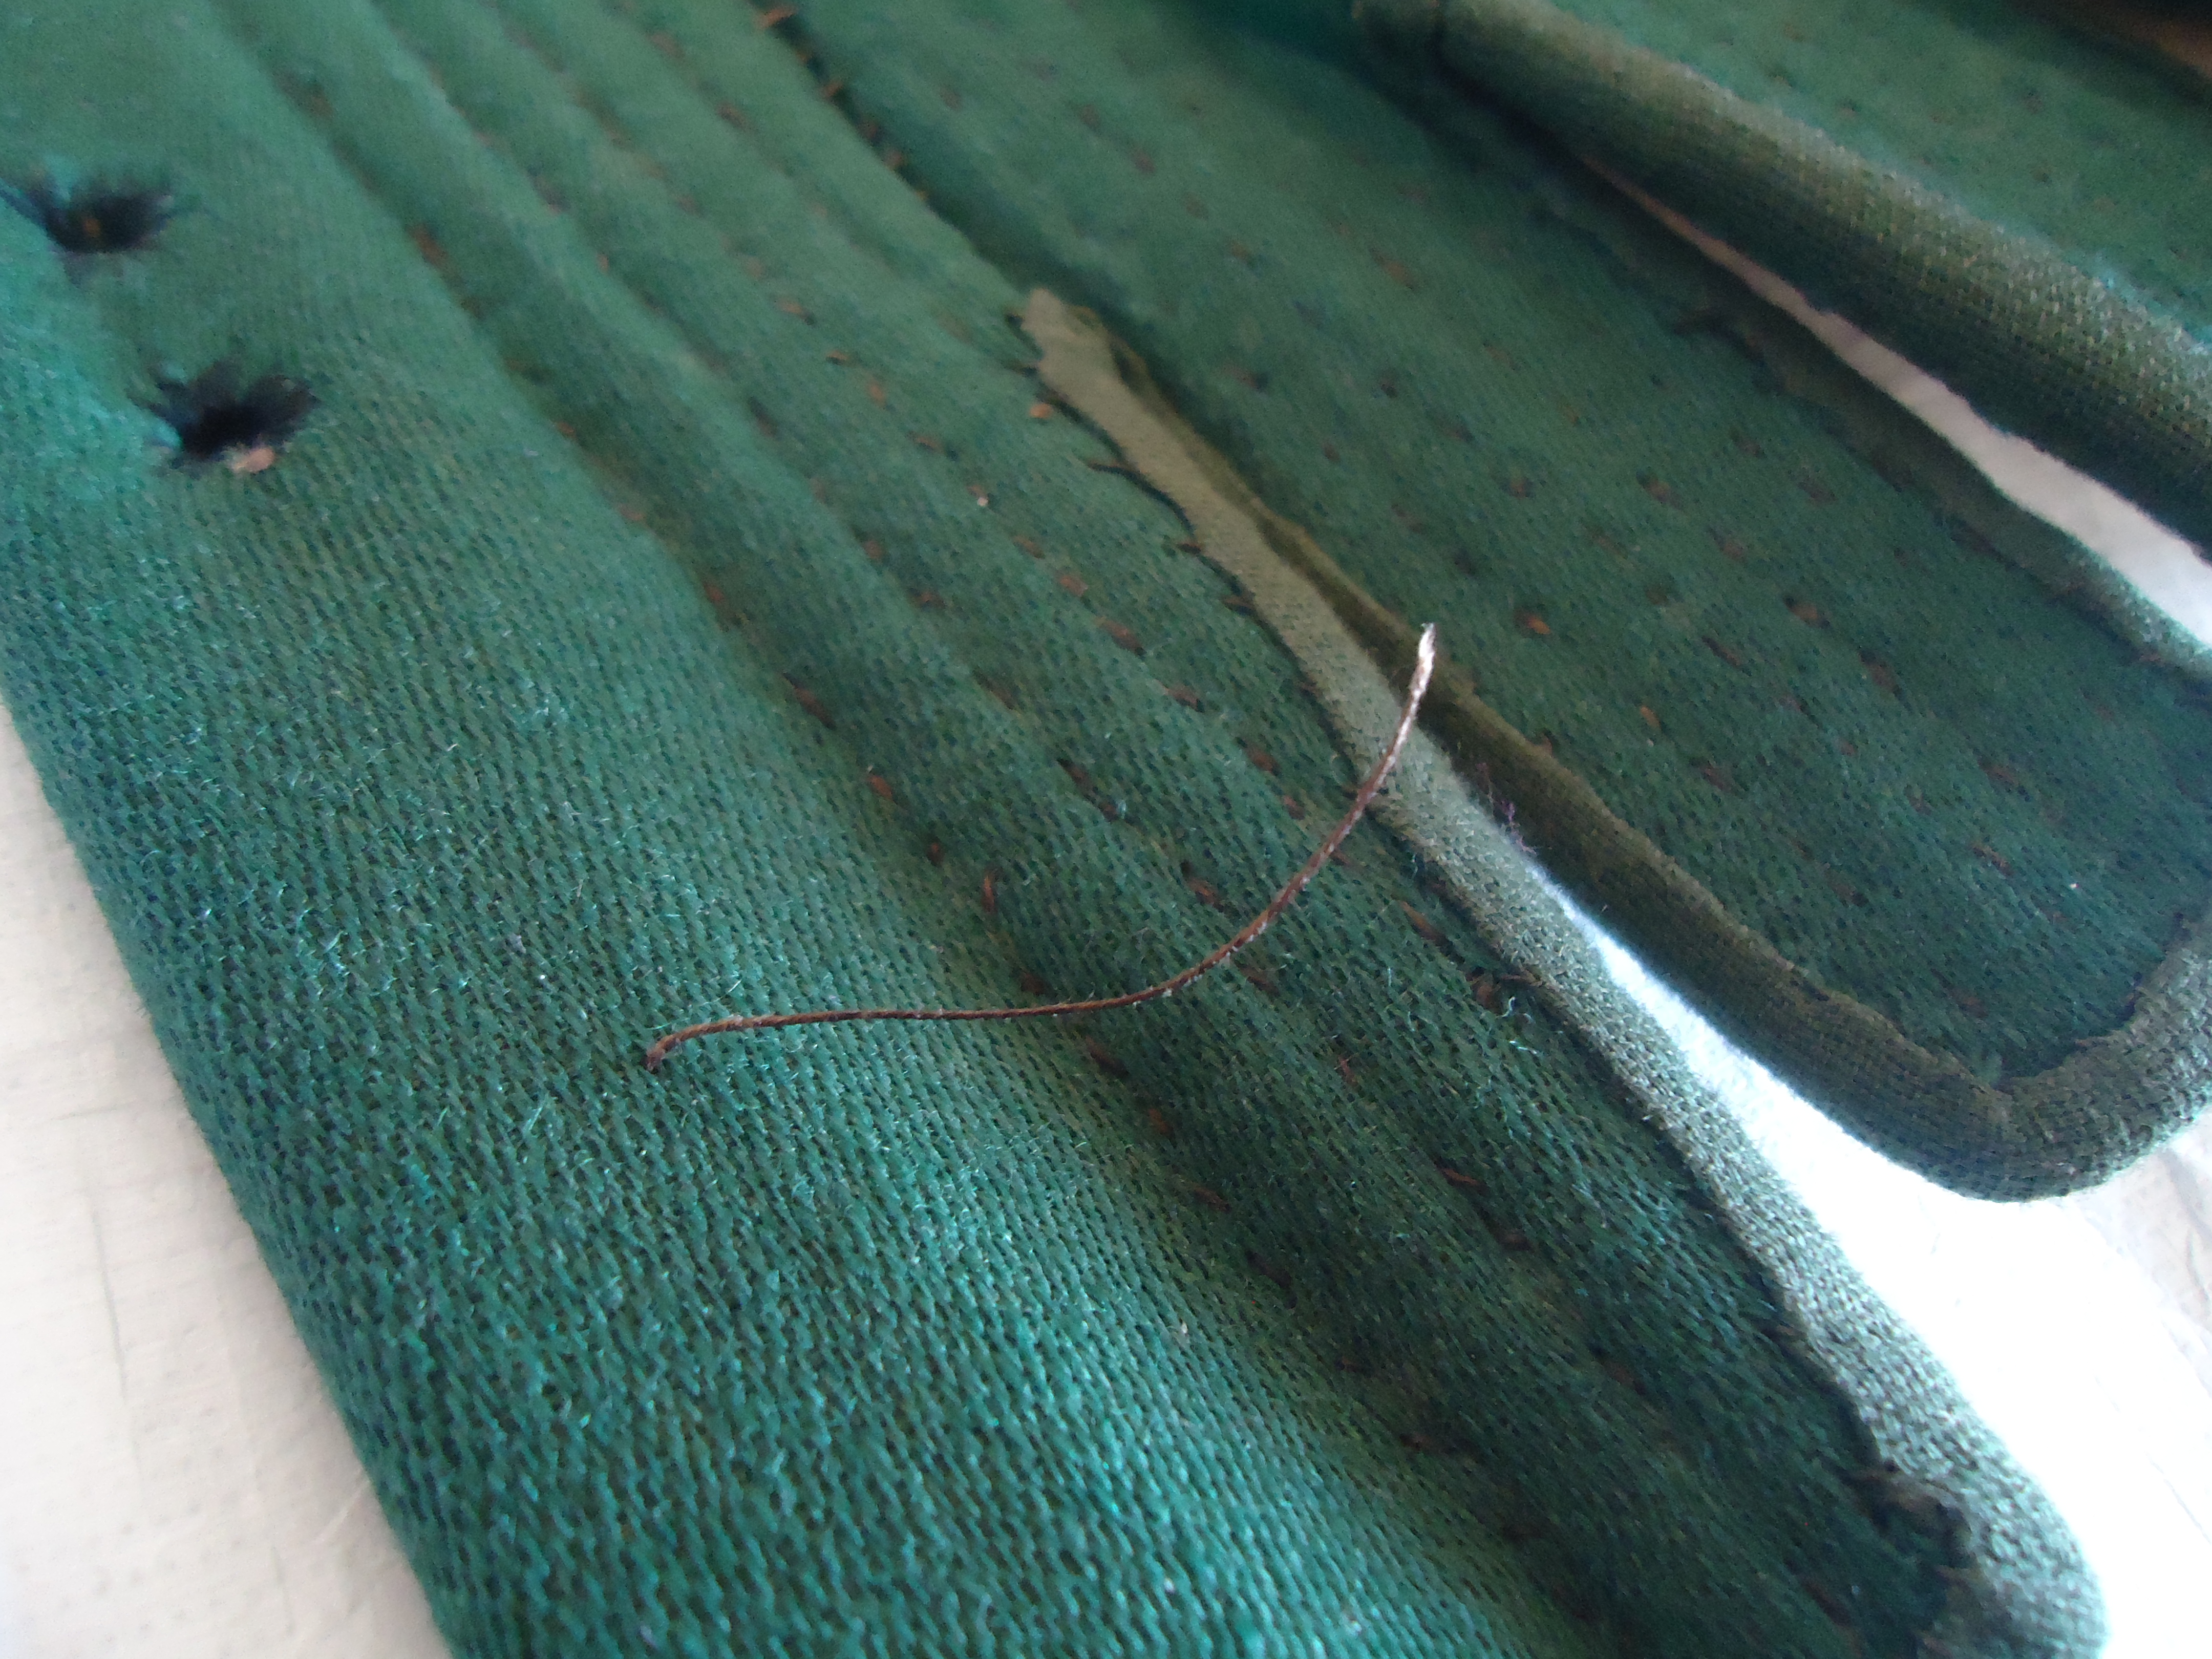
Centre Front Point Detail – SNO.1291
This is a good image above here, because you can see the process that has happened in the recovering. The Stays were recovered first (see inside the tear at the CF point and the green material bunched up underneath), next the Stays were newly lined and then it was bound with that Herringbone twill; either tape or fabric. You can tell this by the way the binding laps over the lining. We’d also guess and say this wasn’t taken back to a Staymaker to do as not only is it clumsy and large stitching, but usually the lining went on last; after the binding. It could’ve been a bad mantua-makers work or more likely done at home.

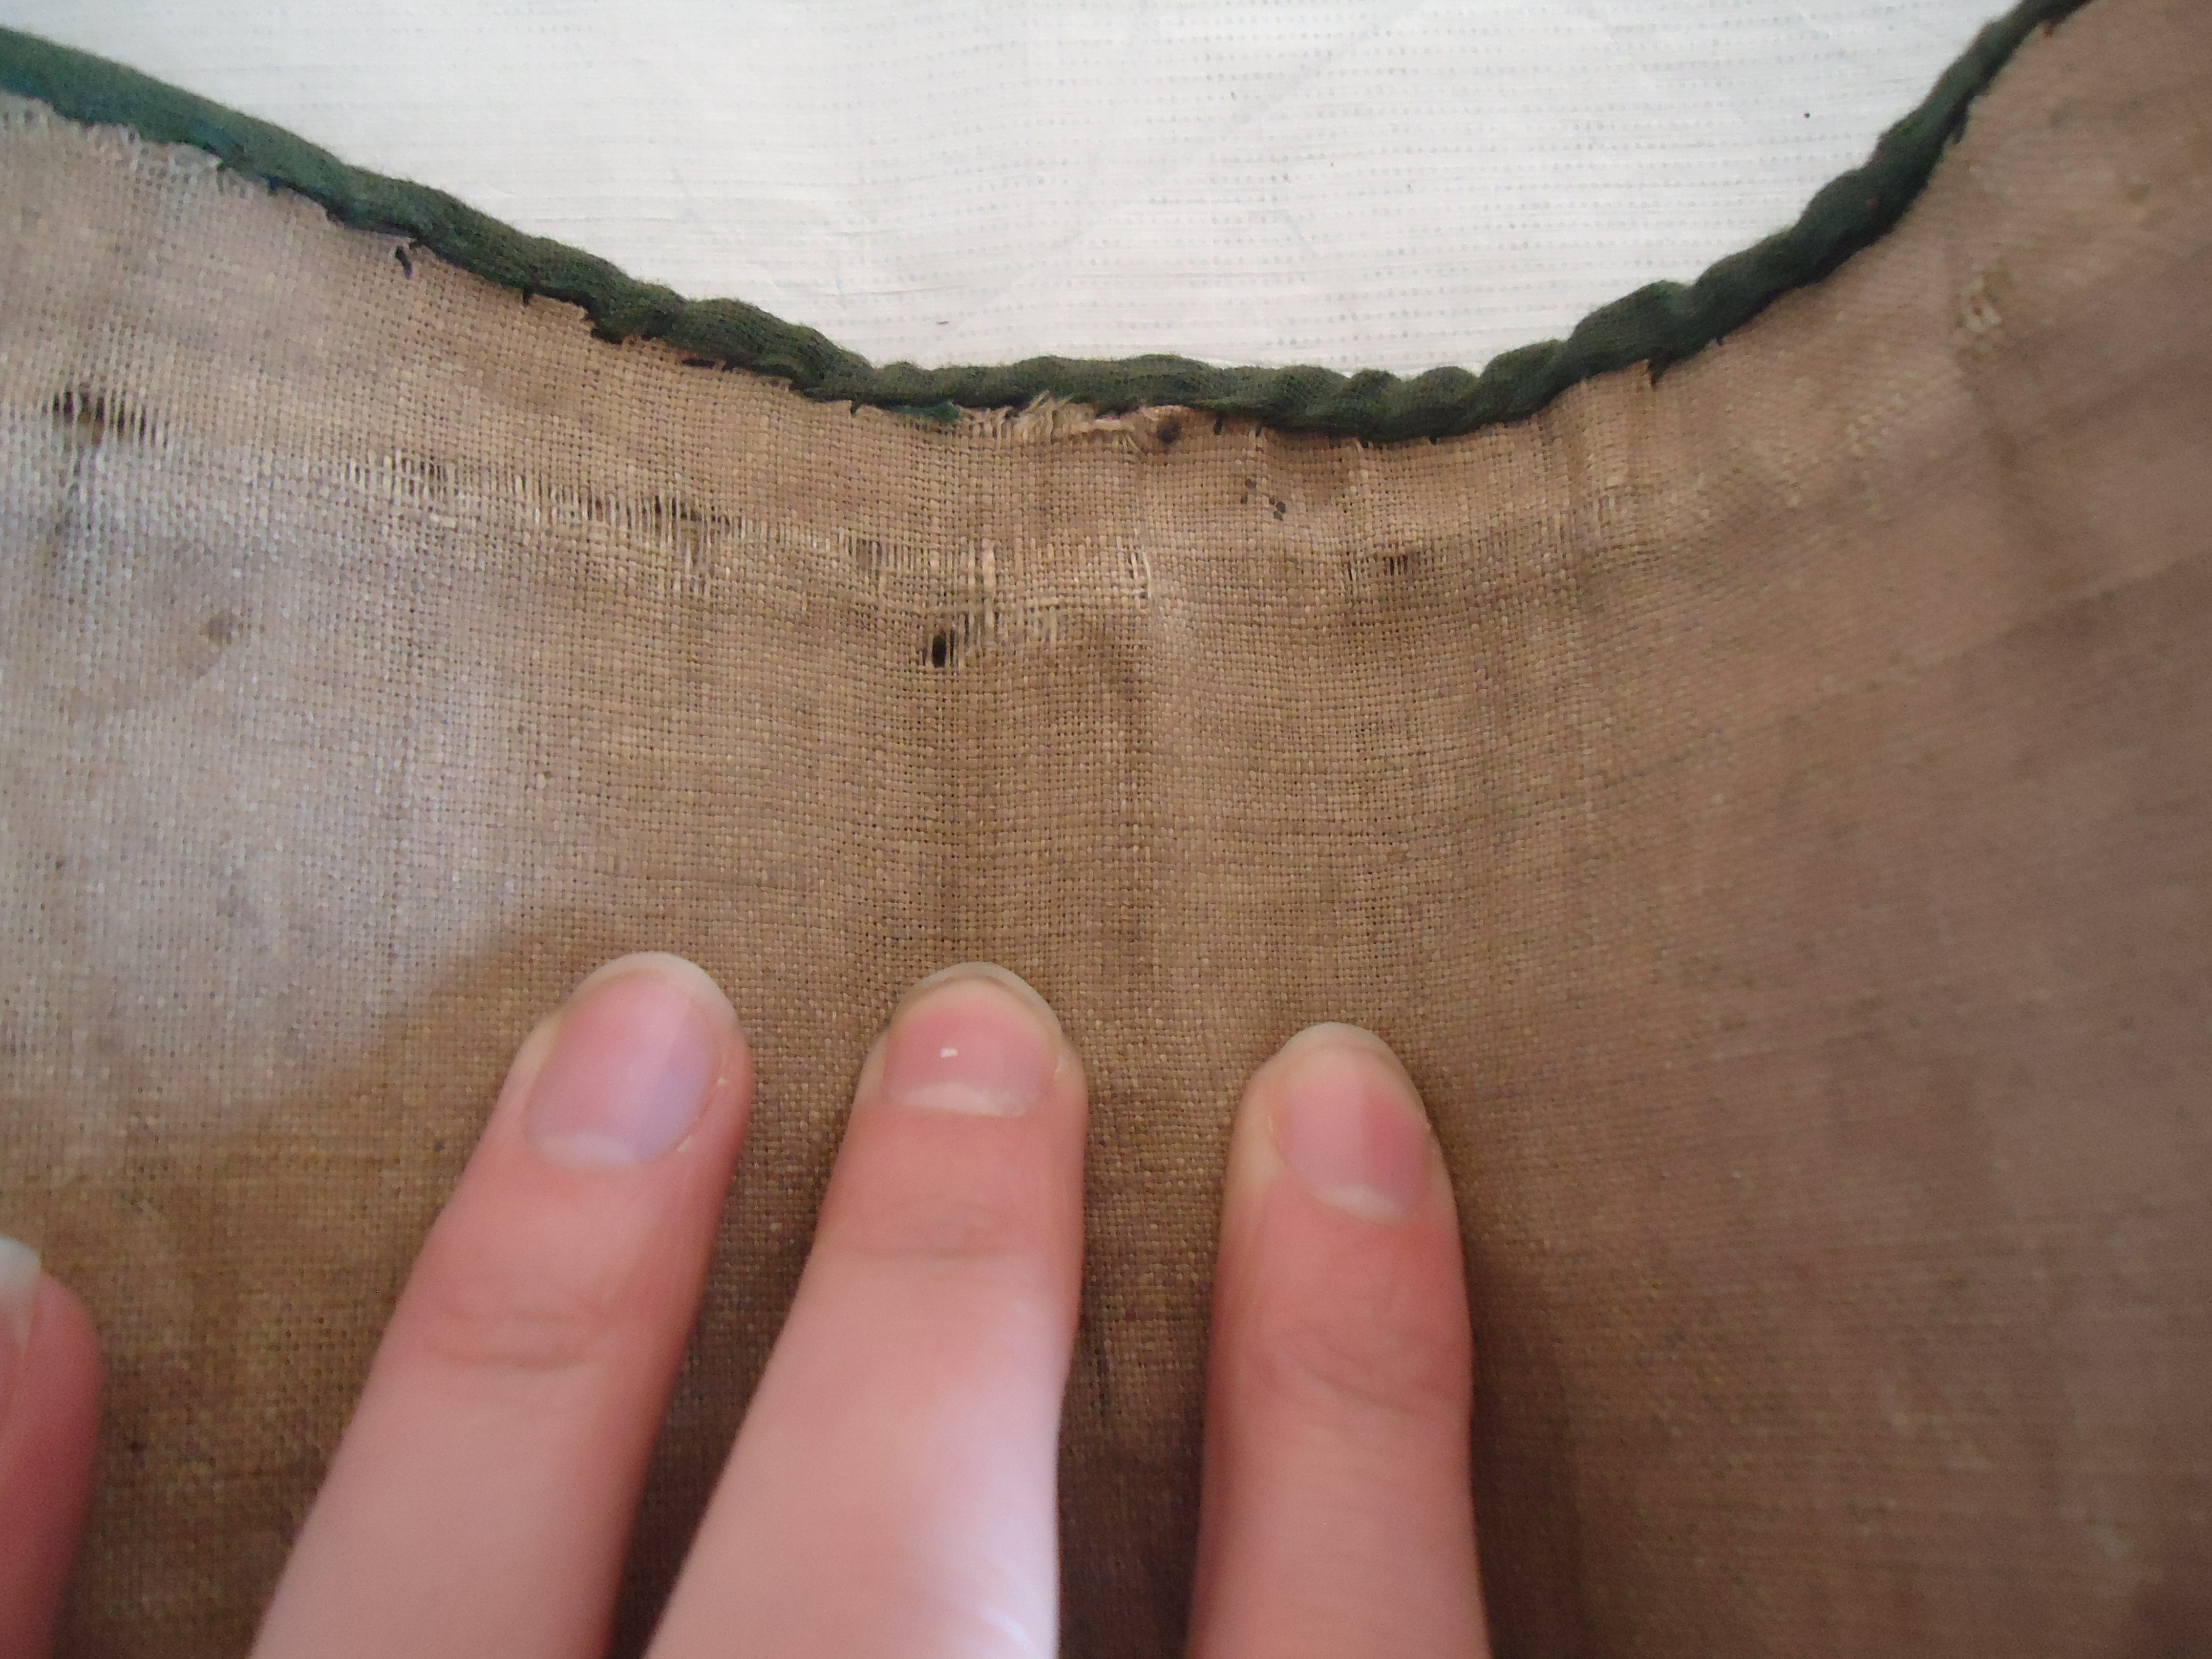
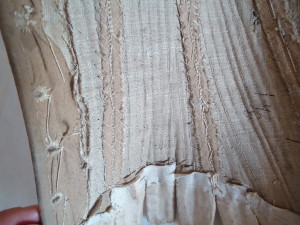
Inside Back View – SNO.1291
It also looks like, either this back tab is the only original, or that she (funny we assume she’s a she!) put it on before she started sewing the Green cover on. Also, all of the thread work has been done in the same dark greeny/brown thread that the covering has been sewn with. It’s quite sweet really.
Inner Boning and Busk
Here in this above image is a closer detail of the curved bone that most Stays seem to have along the top of the Stays (at the Decolletage = posh word for neckline). Again, this bone can vary. Here it is singular and with a flattish feel to it. In others it feels more curved in the cylinder roundness of the bone itself.
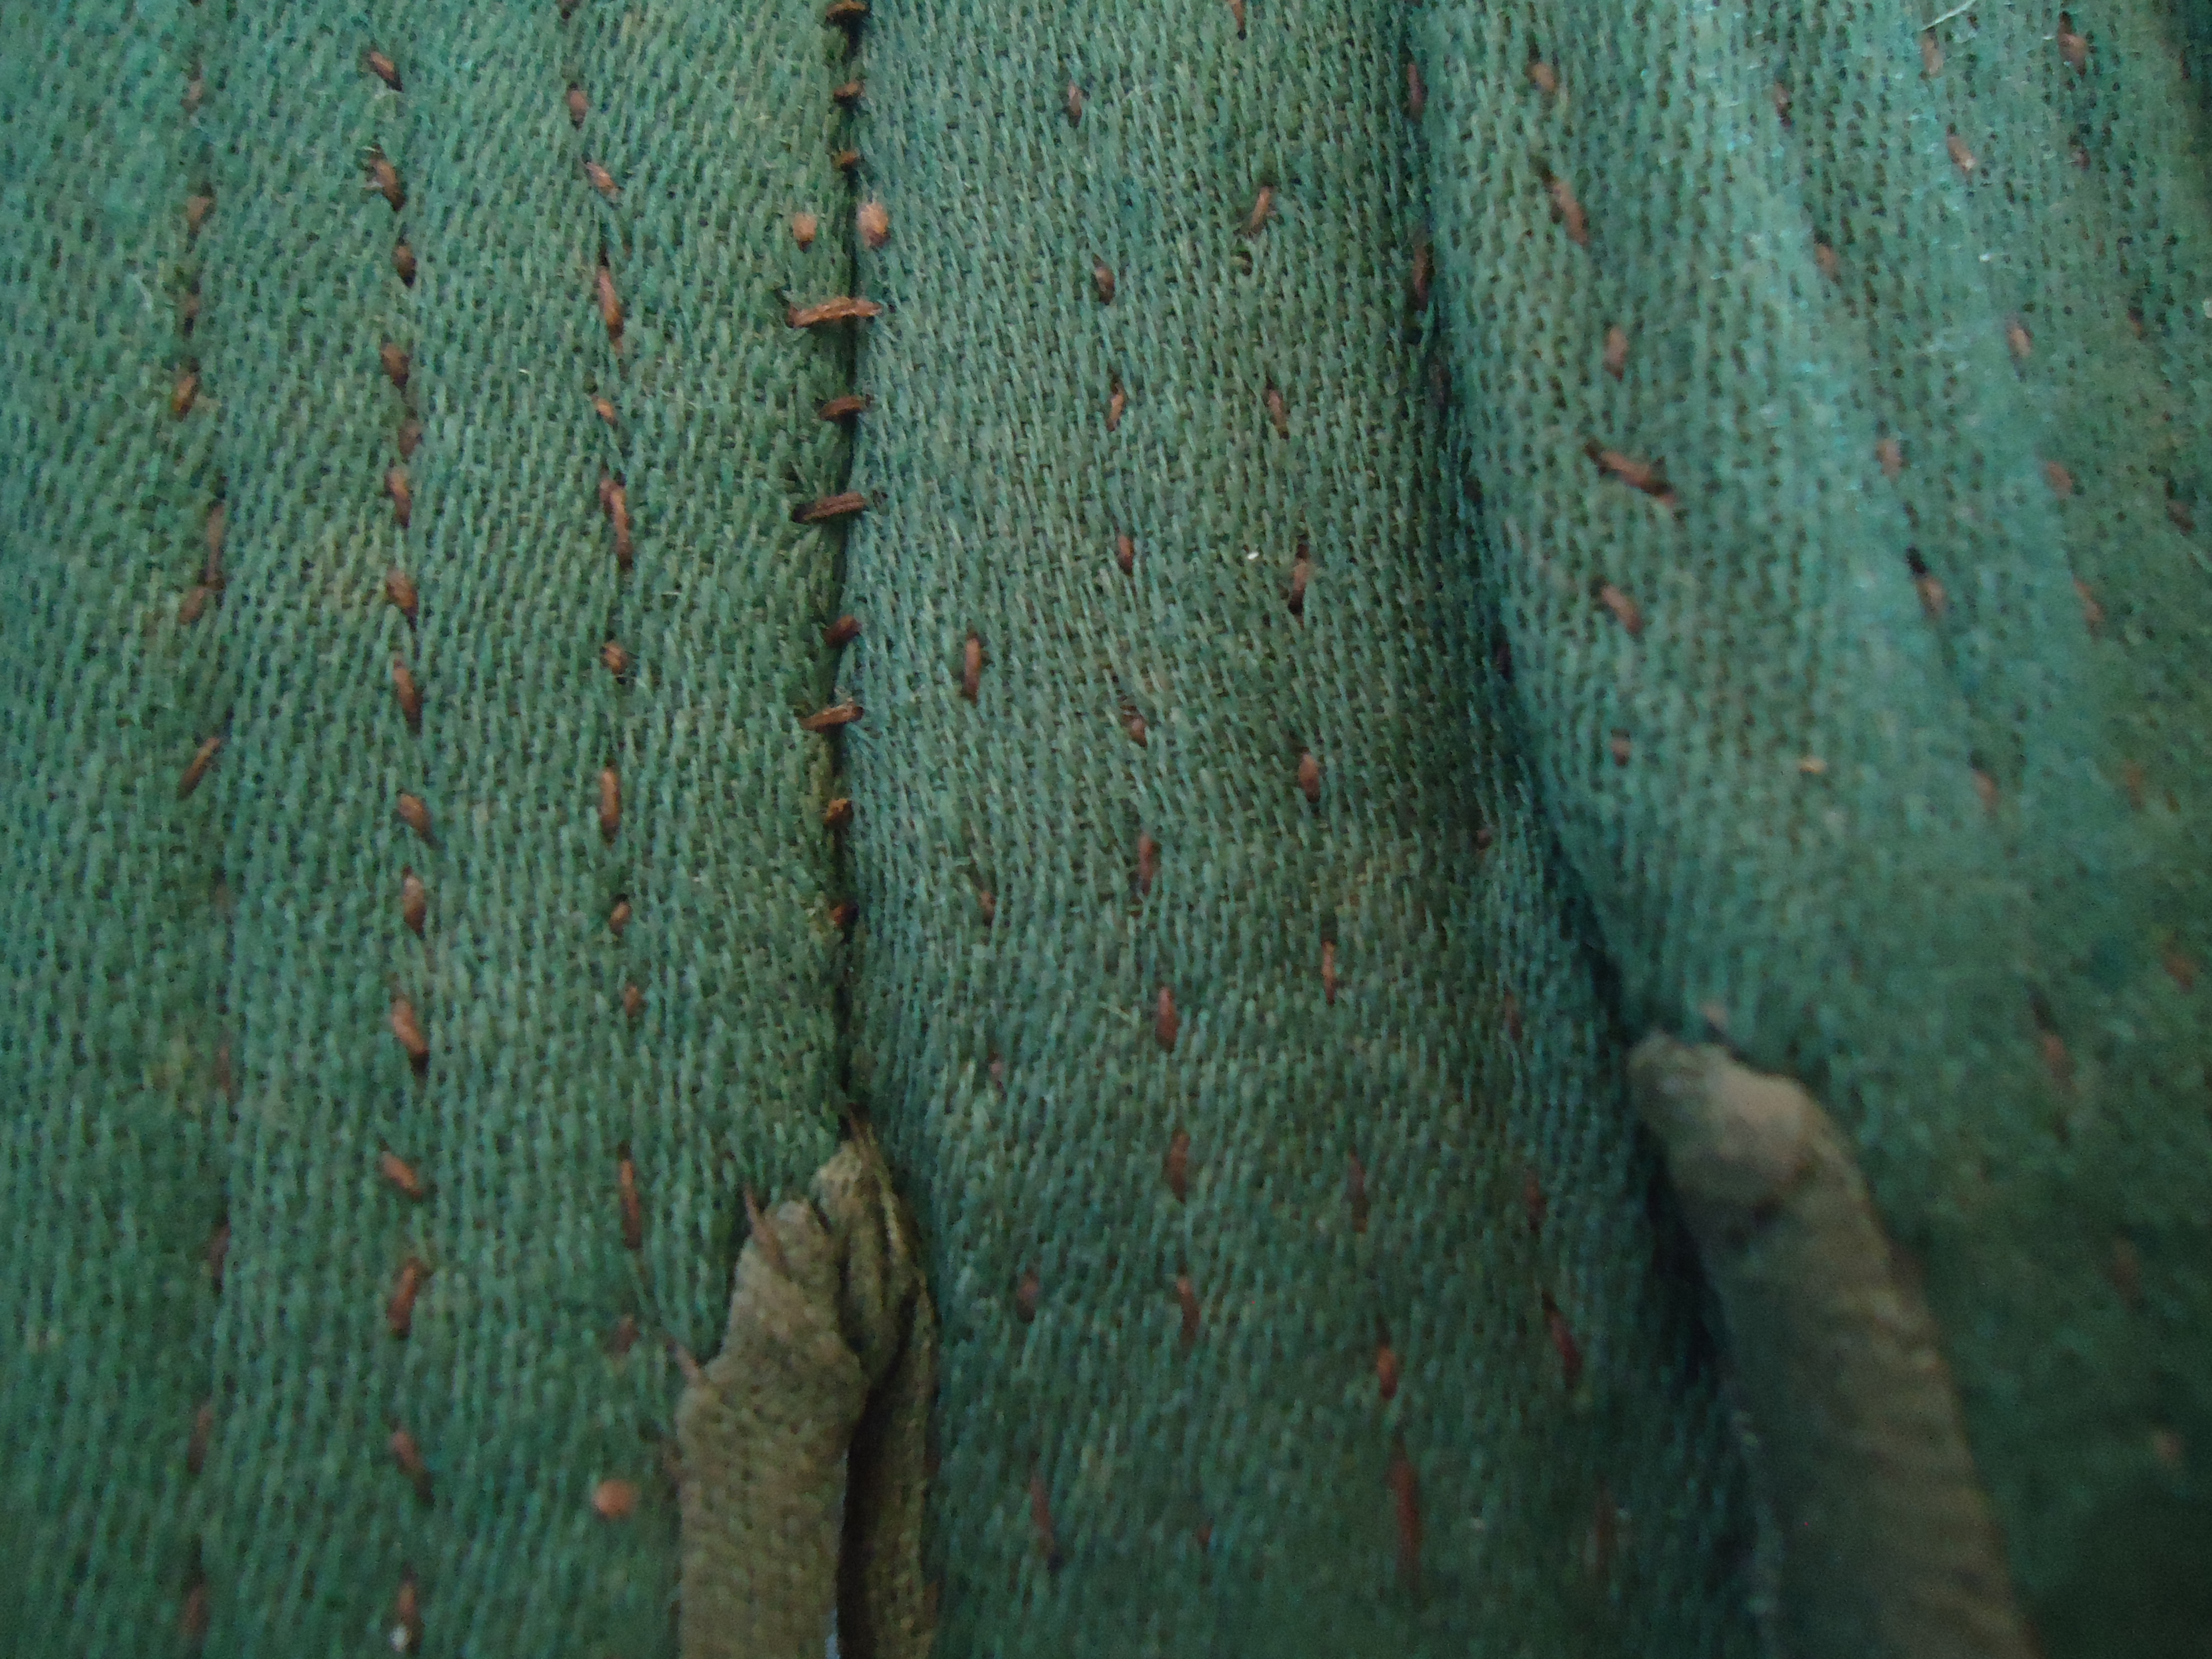
Close up – SNO.1291
The above image here is just another close-up showing the twill tape/fabric that has been used to bind the edges. You can clearly see the grain line here of the tape/fabric so it proves that this binding doesn’t always have to be cut on the bias. You can also see the direction of the grain of the fabric here. Don’t be confused bu the angled weave pattern – we’re not hot on our fabric weaves – but denim and twill and drill all have this diagonal effect while the grainline is the subtle direction of each thread appearance that makes up those diagonal lines.
Stitching.
Example of Panel stitching that looks like a ladder.
Hmmm…it’s a bit of a conundrum this because in the above image you see what we call the ‘ladder stitch’ (which is really just the stitching that draws the two panels together. When the panels are joined it appears like the rungs of a ladder). This gives it the appearance that that brown/green thread is infact holding 2 panels together. However, it could also be the panels sewn together before being applied to the stays and as the fabric has been pulled tight, so it pulls that stitching apart a little and we see the stitching. It’s just funny and a little confusing because it is exactly the same effect when sewing 2 panels together – as seen to our above right here.
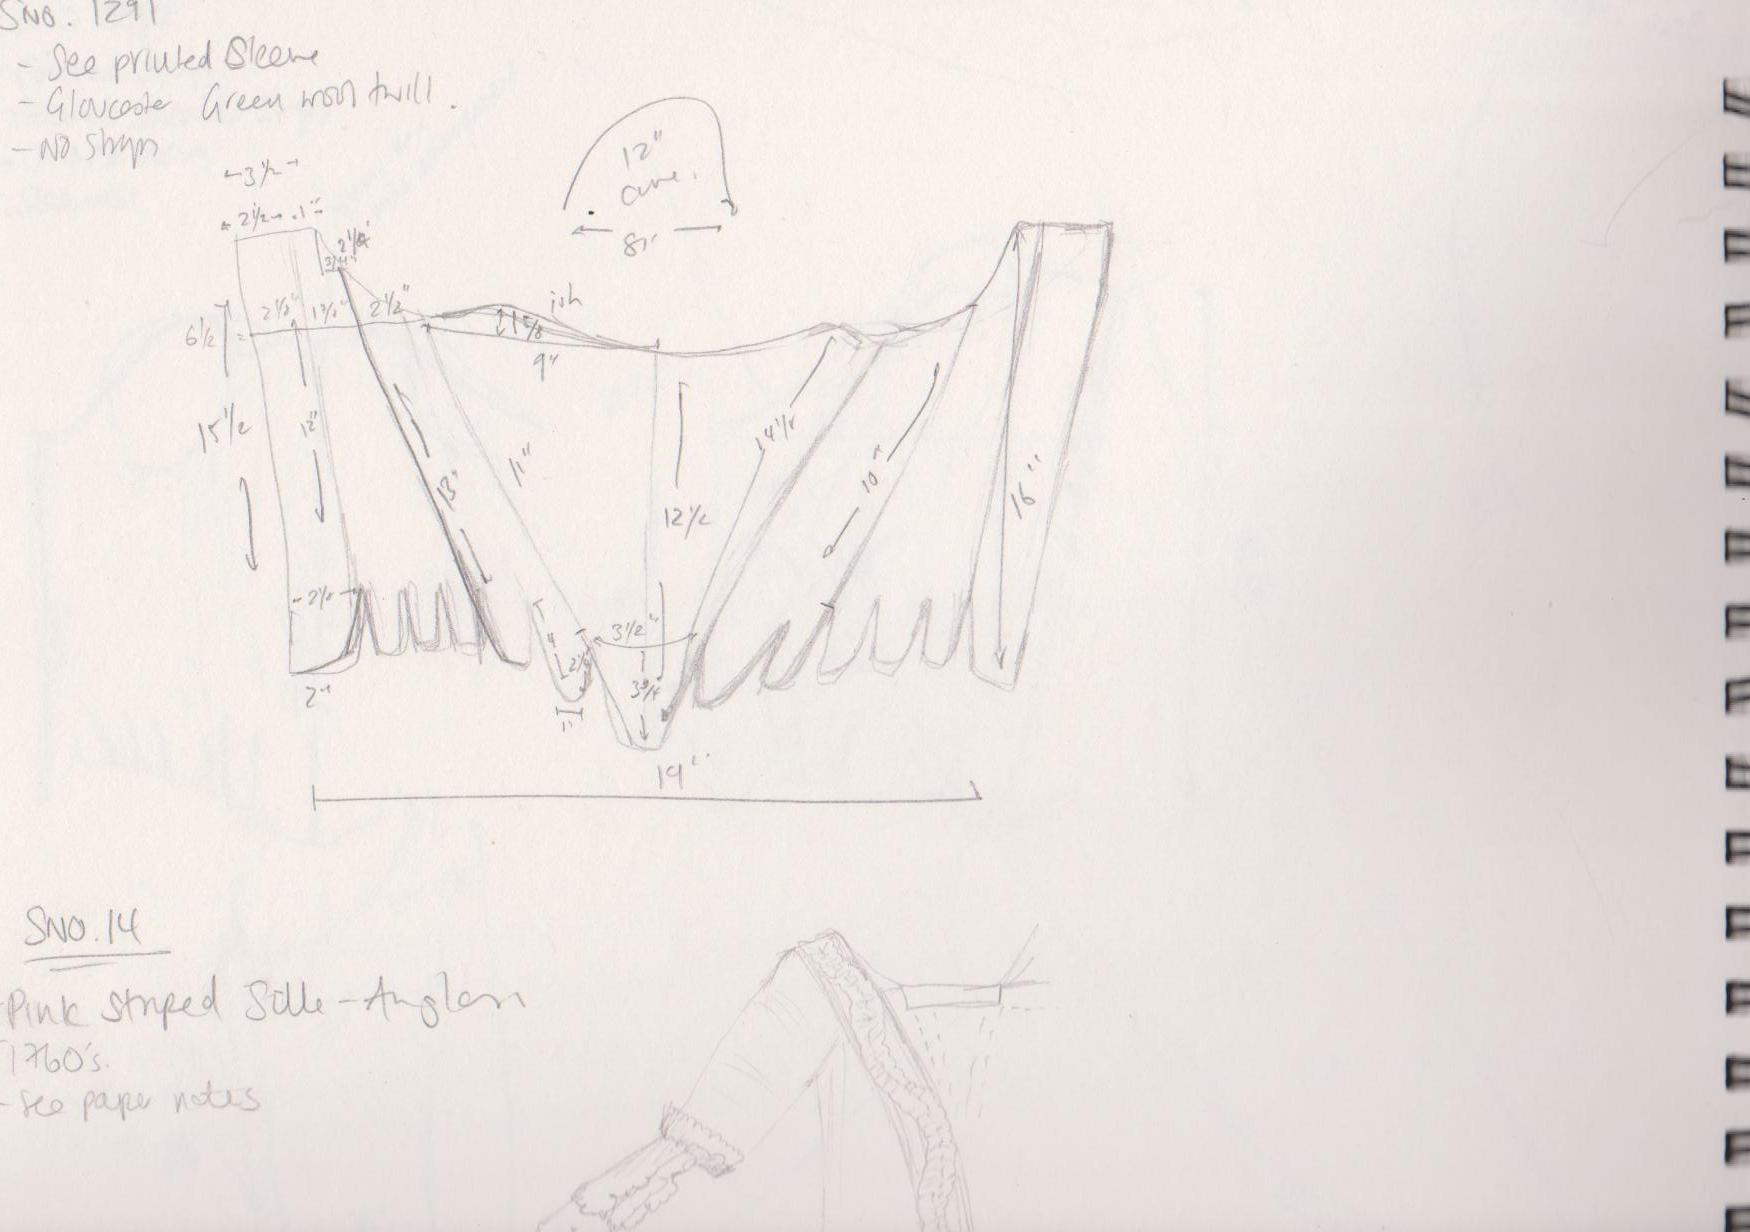
Our Notes from the Study Session – SNO.1291
Our notes gradually during the Study Session get hastier and hastier as the time begins to run out – it’s always the same. These were the 4th item looked at so things had become a bit scribbly and basic.
The Notes include details such as:
– 12″ in the fullness of the CF curve and 8″ across.
– 12 1/2″ CF length.
– 19″ from CB to CB
– 15 1/2″ CB length.
– Back width before it goes into the scye (armhole) is 3 1/2″
– From CF and SF SS at top to CF is 9″ on the half.


