T.16-1961
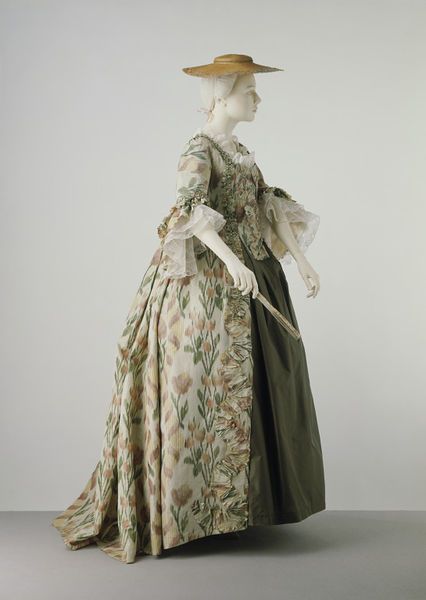
V&A Sack Back Gown
1750 – 1760
(Images taken from V&A website and full acknowledgements and gratitude go to them)
As we’ve previously mentioned, we are unable to upload our images from the study session we had with this gown because of copyright laws but there are images that the V&A have on their website which we’ve used here so that we can still discuss this dress.
Lets start off with a link to the V&A page: T.16-1961 Please click on this link – they’ve got a fab description of the alterations made in the ‘More Information’ tab and it’s well worth a read!
It’s always hard to work with a gown that has had alterations made to it but in essence the museum says that the ‘sewing dates 1755-1765’ and then was altered in the late 19th Century. These ‘sewing dates’ look like the 2nd time this gown was made up and it’s not these ancient stitch lines that are being classed as the alterations. The whole dress was re-made (a very standard thing to do back then) so the sewing methods are from the c.1760s.
We initially wanted to study this dress because we have a long term goal of plotting and learning from as many mid-18th century Sacks as possible to see if what similarities there are in the pattern construction and design. It’s always hard to know in a pattern, what’s fashion, what’s the knowledge of the day, what’s the ladies shape and what’s the makers own personal preferences. The more gowns that get looked at the easier it is to be able to detect a trend.
Our Notes:
Dress Details:
- Sack Pleats are quite wide and come across the whole back panel. This is possibly a fashion design as it does seem that from the beginnings of the sack the pleats grow from being wide, loose and uncontrolled to being neater, narrower and much more controlled. This dress sits nicely in with the still wide-ish pleats but with more control.
- Back neck measures: 8 3/4″ in a straight line from shoulder to shoulder.
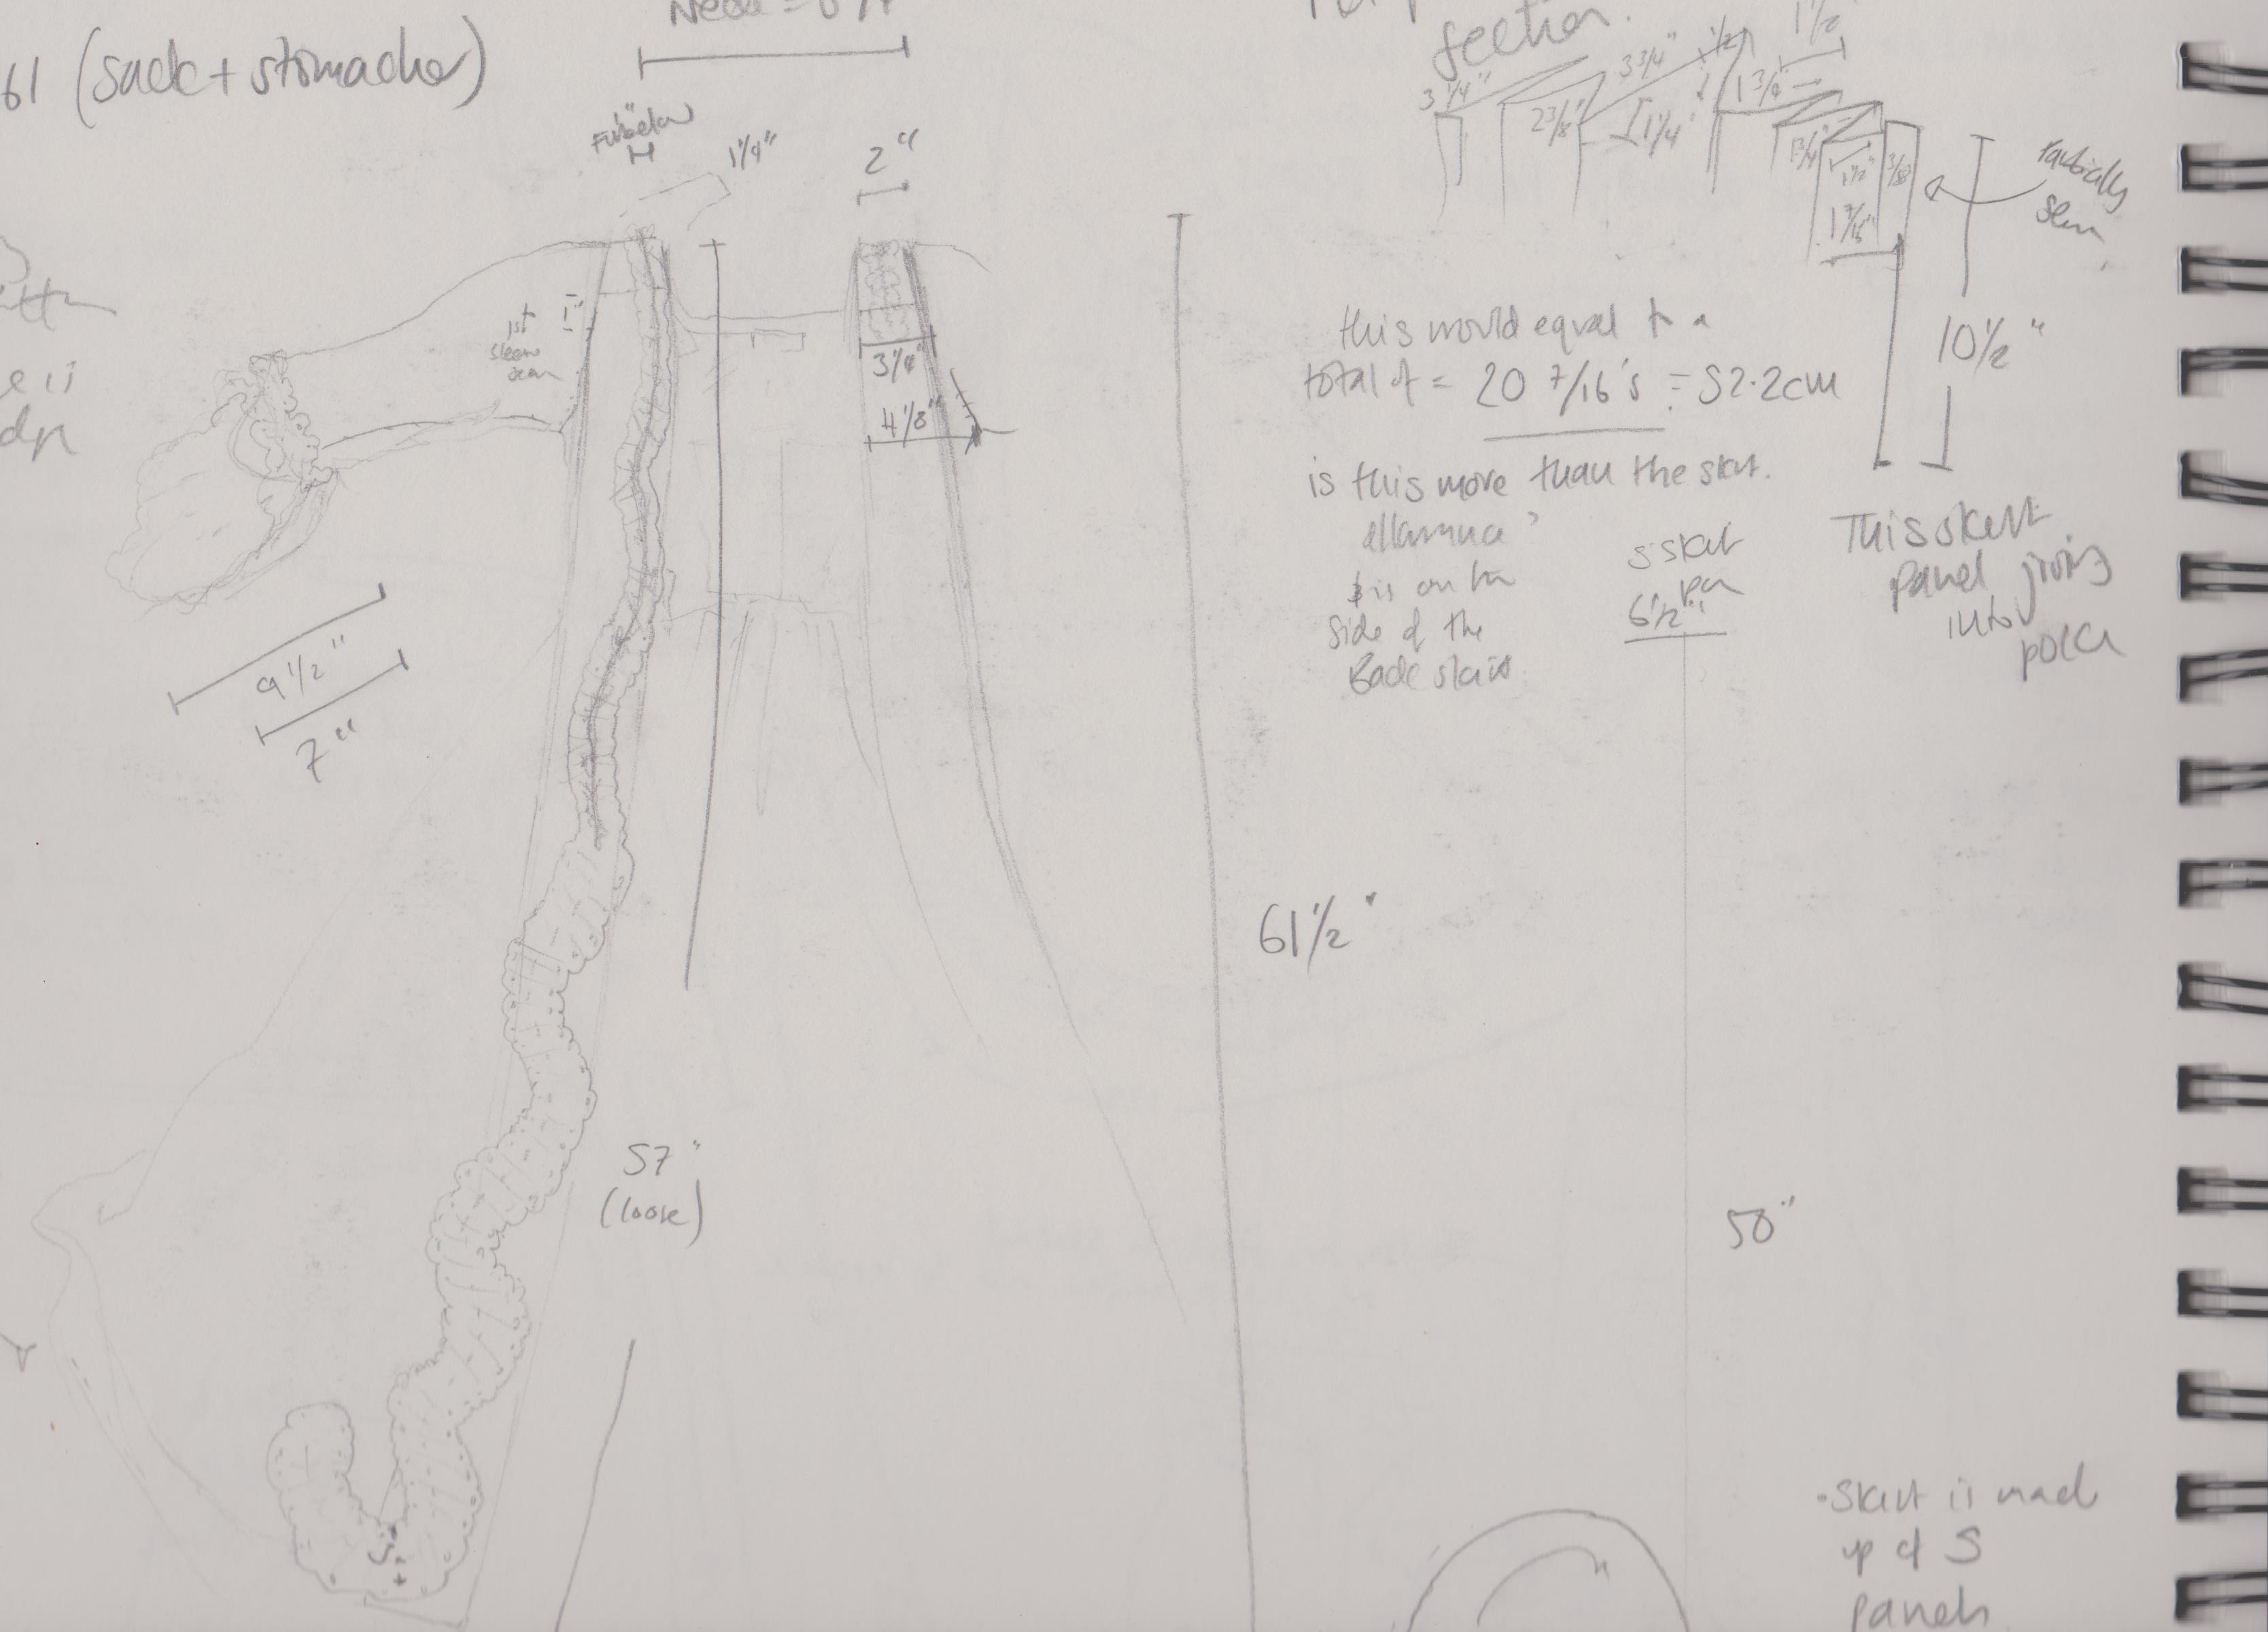
- This dress has double robings beginining at the shoulder with a width of just 2″ to broadening out to 4 1/8″ at about just below bust line.
- The outer robing disappears into the skirt a few inches below the bodice seam line. The main robing travels right down to the hem, being the base the furbelow is mounted one and being caught down with stitches. It is not easily seen below the trim.
- CF length of dress is: 57″. One skirt this is simply the selvedge turned in so it must be the same with the top under the robings which is interesting.
- Complete dress length (from shoulder to train) = 61 1/2″
- Skirt of dress is made up of 5 silk panels. Each panels has a finished width of 25″
- Pk pleat section has another panel added onto it to make the front skirt wider. This is hidden in the pkt pleating.
- Plt pleats have 6 folds. Each actual tuck comes in at around about an average of 1 1/4″ – 1 1/2″ but the staggering of the pleats means that some of the other side of the pleat can measure as much as 3 1/4″.
- There is no seam on the front bodice – it is grown on from the skirt panel.
- The seam begins with bodice at the CB, being grown on from the sack back pleats. This is another possible example of an actual fashion pattern cutting change.
- Fly trim decorates the furbelow trim only as far as just below waist.
- Furbelow trim has been pinked with a scalloped pattern and inner dot. This trim decorates the robings at the CF and along down the front egdes of the gown, getting wider as it goes further down. Also, once into the skirt the furbelows being to swathe in 5 waves and ending with a curl at the bottom. The trim by the time it ends at the bottom of the skirt is 3″. It started off as being 1″ at shoulder.
- Sleeves end with quite an exaggerated curve to the elbow and strangely they haven’t achieved this effect by using a bias binding but by bagging it out, to all appearance, with the sleeve lining. We’ve not seen this method very often. This means it has a slightly unhappy sit to it but it is well hidden by the ruffles being sewn on.
- Ruffles have been edged with the same pinking as the furbelows and seem to be gathered up together to the size of the pleat about an inch down from the top using a gathering whip stitch. This is a method (not neccesarily the correct name for it though) which is often used to join a ruffle to a finished edge and is used in caps and shirts. Here is has been done by folding down the top of the ruffles and gathering the ruffle by sewing a needle along and curling it around the folded edge. This now-gathered ruffle gets whip stitched onto the sleeve. In other gowns the folded down top bit stays folded down but in this particular one it’s been pressed back up. Please see the above image for a better understanding of this.
- Top Ruffle measures 7″ in length.
- Second Ruffle measures 9 1/2″ in length.
- Full scye measurement is 14 1/2″.
Stomacher Details:
- Stomacher is 14 1/4″ long by 10 12″ wide at the top and 5 1/4″ at the bottom.
- However, the top is angled down to the Central point, so that central measurement is only 13″.
- The furbelow trim that decorates it is 1 1/2″ wide and roll in swathes down the centre.
- It feels like just 2 layers of fabrics – one silk, one linen.
- There are pin marks that neatly run parallel with edge by about an inch. It is very regular and neat suggesting that the measurement of the dress

Image taken from the V&A website.
has been designed for the stomacher to have this one inch meeting line. And also that whoever wore it wore her Stays at the same tightness each time she wore this gown.
- This gown did not come with a petticoat.
Other Details:
- As you can see here in the back shot of the gown taken by the museum, the pleats have been pieced. But it is actually more than just a simple piecing as the top sections only looks like it has underneath pleats but is infact just the fabric un-pleated. You can stick your finger in beneath it it’s that obvious but the essential look is that it is just a row of stitching holding down the pleats. It would be interesting to try and log the fashion for this stitch line that held the pleats down as we know we’ve seen it quite a few times before but it’d be good to try and see what periods it appears in.
- Chine silk is according to various sources, quite an expensive option of silk. We’d love to understand this logic of piecing and when and where it was acceptable to use it. Because this gown has been re-made it’s highly likely the piecing happened to get the fashion style out of the silk of the original gown. Why would you choose such a terrible place to put a piecing in such an expensive fabric otherwise? However, this is not fact, just musings.
- Her proportions are intruiging. The gown has quite a short nape to waist for a time when the waistline sat roughly around the waist line are, suggesting that the lady was quite short. It is also fairly small in size. coming in at about a size 8. However the skirts are much longer than this proportion should suggest. So, she was either a super model size – ie very tall for the period and with super long legs and a short body, or the skirts have been cut longer for the hooped petticoat. We’re opting for the latter as being more realistic but it’s hard to make that as a statement of fact when we don’t know for sure. We’ll put it like this: The length of the skirt looks to have been cut extra long to accommodate the hooped petticoat.
We’ve also uplaoded a scanned in copy of our notes but to be honest because we were concentrating on attempting to get a pattern from the gown, our notes are not up to their usual informativeness. Sorry about that 🙂


